 Experts Need expert help? Don’t hesitate to talk.
This tutorial is divided in to two posts and this one is part 2. Here, I will cover advance settings of adding and managing the products to your online store in Magento 2.0. Visit part 1 if you are looking for basic settings to add product in Magento 2.
To begin with, first login to your Magento Store using your login credentials and visit: Product > Catalog > Add Product > Advance settings
Advanced Settings:
All the major advanced product settings including the pricing, inventory, up-sells, cross-sells and so on are all performed in this section.
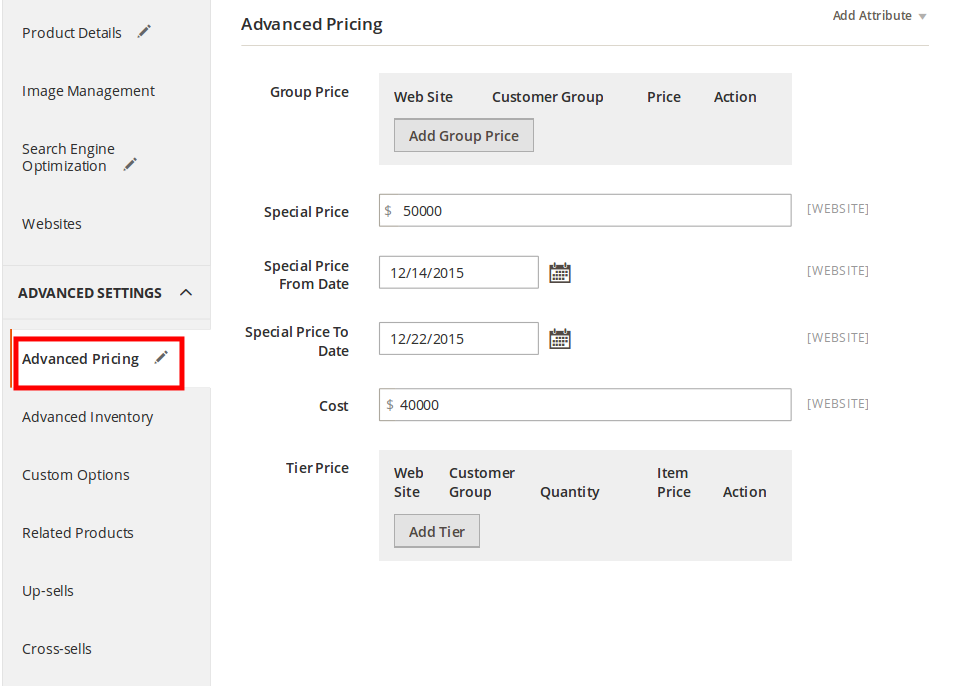
2.1 Advance Pricing Tab
Advance Pricing gives you the facility to add special product price or promotional price and recurring payments for the products added at your store.
2.1.1 Advanced Pricing
Visit Products>>Catalog>>Advanced Pricing
2.1.1.1 Special Price: Enter the product special price in this field.
2.1.1.2 Special Price From Date: Select date from calendar or enter the date to start implementing the special price on the selected product.
2.1.1.3 Special Price To Date: Select date from calendar or enter the date to define the end date until when the special price will remain active for the selected product.
2.1.1.4 Cost: Enter the actual cost price of the product.
2.1.1.5 Tier Price: This field allows user to offer a special price of the product to the certain store and specific customer group on buying the given product quantity. For Example: Suppose special price of a product is $32.00, you selected a particular website, customer group as ‘Retailer’, Quantity as ’10’ and Item Price as ‘$30.00’.
Now, at the storefront, when the retailer purchase particular product with minimum quantity of 10, then they will get the product at the price of $30.00 each.
2.1.1.6 Manufacturer’s Suggested Retail Price: Enter the retail price as suggested by the manufacturer.
2.1.1.7 Display Actual Price: This field allow you to select where the actual product price should be visible to customers. There are four options where you can display the actual price of the product:
- Use Config: Display at the default Magento Store location.
- On Gesture: This will display the price on clicking the ‘Click for price link’ that is available on product list and product detail pages. When the customer clicks on that link, then a window will pop out displaying the price and a message. The product price will be displayed on the Shopping Cart page, the Cart Sidebar and at the Order Review step of the checkout process.
- In Cart: Display in Shopping Cart, Cart Sidebar and Review Order step of the checkout process
- Before Order Configuration: Display before confirming the order i.e. Review Order step during checkout process.
2.2 Advance Inventory Tab
Now, we move further with the Advance Inventory Section from where you can manage your product stock available in your store. Here you can specify the quantity of items and manage if product is ‘In Stock’ or ‘Out of Stock’.
2.2.1 Advanced Inventory
Visit Products>> Catalog>> Advanced Settings>> Advance Inventory
2.2.1.1 Manage Stock: To perform stock management, first uncheck ‘Use Config Settings’ checkbox and select ‘Yes’ from Manage Stock dropdown.
2.2.1.2 Qty: Enter the quantity of the products you have available in your store.
2.2.1.3 Out-of-Stock Threshold: It specifies that the quantity of product mentioned in this field is to be considered as ‘Out of Stock’. Meaning when the product reach the particular quantity, then the product will not be displayed at storefront.
2.2.1.4 Minimum Qty Allowed in Shopping Cart: It defines that the customer should buy at least the minimum quantity of products as mentioned in this field to increase product sell.
2.2.1.5 Maximum Qty Allowed in Shopping Cart: It defines that the customer can purchase only the maximum quantity of products as mentioned in this field to avoid mass buyouts in your store.
2.2.1.6 Qty Uses Decimals: If your product is sold in different units of weight, length or other units and require customers to enter the quantities in decimals, then select ‘Yes’ option.
2.2.1.7 Allow Multiple Boxes for Shipping:
2.2.1.8 Backorders: Uncheck ‘Use Config Settings’ checkbox. This defines whether the customers are allowed to place an order for the products that are ‘Out of Stock’
You are allowed to select any one option:
- No Backorders: This will not allow placing an order for the ‘Out of Stock’ products.
- Allow Qty Below 0: This will allow placing order for the ‘Out of Stock’ products.
- Allow Qty Below 0 and Notify Customer: This will allow placing order for the ‘Out of Stock’ products and the customers will be notified of product availability so they can continue the checkout process.
2.2.1.9 Notify for Quantity Below: Enter the product quantity to get a notification from Magento once the product reach below the specified quantity.
2.2.1.10 Enable Qty Increments: This will allow the customer to buy the products by incrementing its quantity as specified in its ‘Qty Increments’ fields.
2.2.1.11 Stock Availability: To temporary remove a product from your storefront, select ‘Out of stock‘ option from this dropdown.
2.2.1.12 Click on ‘Save’ button to save the details.

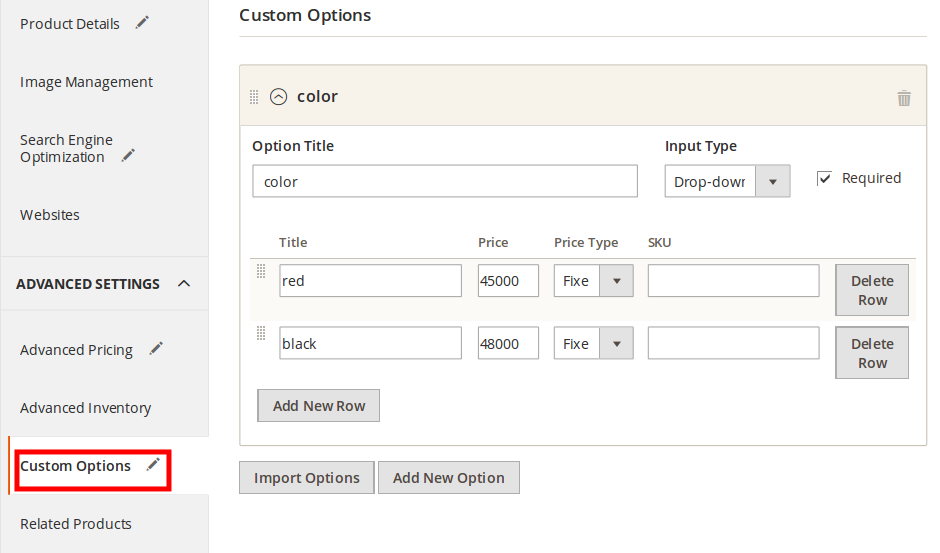
2.3 Custom Options Tab
2.3.1 Custom Options
Visit Products>> Catalog>> Advanced Settings>> Custom Options
2.3.1.1 Click on ‘Add New Option’ button.
2.3.1.2 Enter the ‘Option Title’ as ‘Delivery Date’ and select the ‘Date’ as ‘Input Type’ from the dropdown. To make it mandatory field, check ‘Required’ checkbox.
2.3.1.3 Enter price of the product variation, select price type as fixed/percent, SKU and Max characters.
2.3.1.4 If required, you may add more options.
2.3.1.5 Click on ‘Save’ button to save the details.
2.3.1.6 If you want to import the product variations of other products, then click on ‘Import’ button and select the product.
 Now, the particular product will be displayed as below:
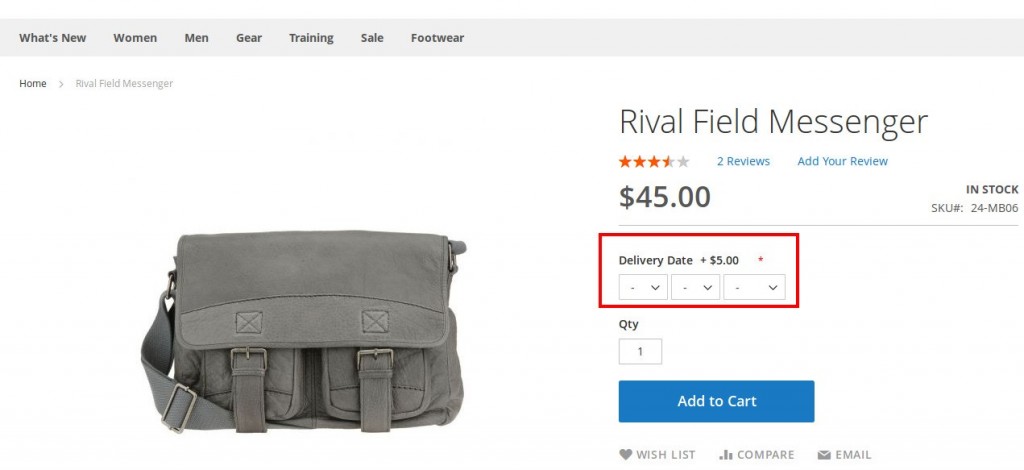
Similarly, user can add as many variations they want to be displayed in the storefront for the customers to make the selection during their purchase.
2.4 Related Products Tab
These Related Products are displayed at the bottom of the product page. When user perform any search and land on a product, then if any related product is available then those products will be displayed at the bottom of the product page to allow user also have a look at them if they wish.
2.4.1 Related Products Tab
Visit Products>>Catalog>>Advanced Settings>>Related Products
2.4.1.1 Now, there are two ways to search and add related products:
2.4.1.2 Firstly, use filters given above to search the products by its ID, Name, Type, Attribute Set, Status, Visibility, SKU, Price and Position.
2.4.1.3 Secondly, you can simply select ‘Any’ from the drop-down to get list of all products.
2.4.1.4 Click on ‘Search’ button to get products filtered according to your performed search criteria.
2.4.1.5 Only the products related to your search will be displayed in the screen.
2.4.1.6 Add products by checking their check boxes or to add all products check header check box.
2.4.1.7 Click on ‘Save’ button to save products.
Now, when you view the particular product at the front-end, then the related products will be displayed at the bottom.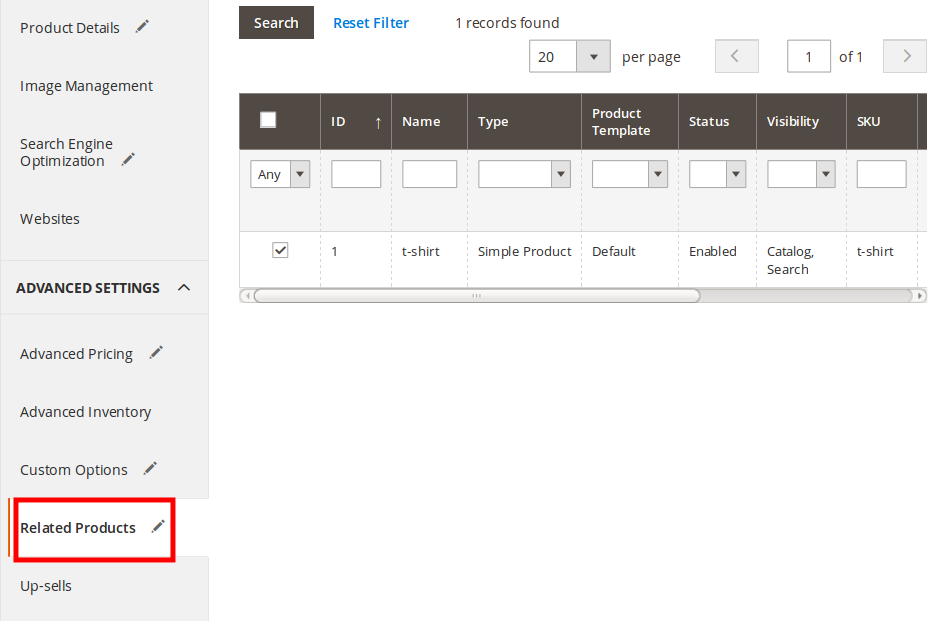
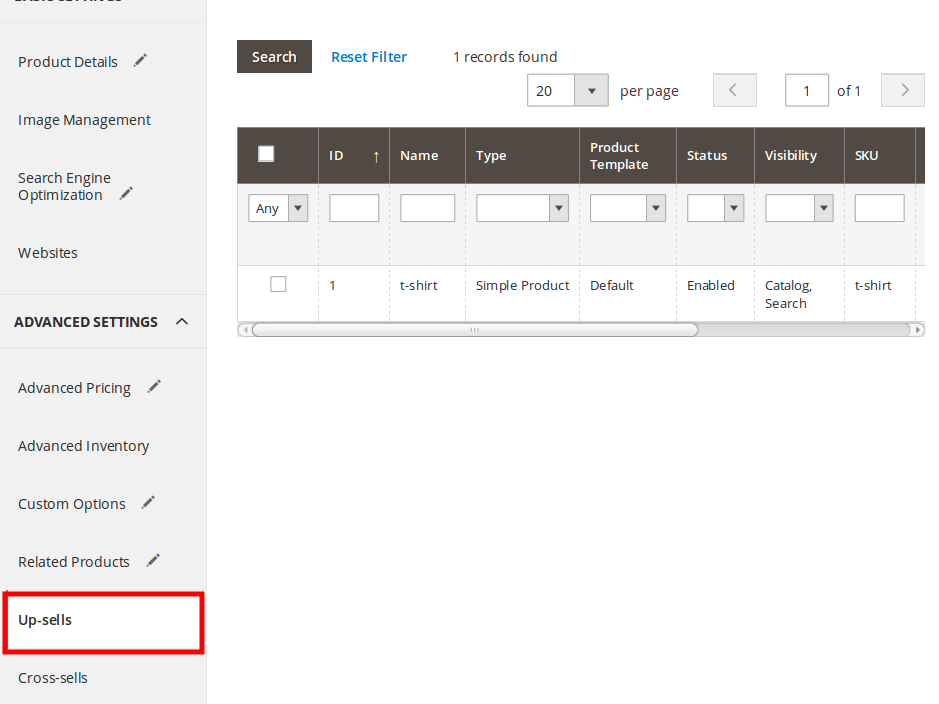
2.5 Up-sells Tab
Visit Products>>Catalog>>Advanced Settings>>Up-sells
This section allows presenting higher version of the respected products which the customer wants to buy. This may be letting the customers to spend more money in buying an expensive model of the same type of the product.
For Example: If customer wants to buy a laptop of processor ‘2.6GHz Dual Core Intel Core i5′, then you will present the same laptop with enhanced processor of 2.8GHz Dual Core Intel Core i5’.
2.6 Cross-sells Tab
Visit Products>>Catalog>>Advanced Settings>>Cross-sells
This section allows the admin to get the customer in buying additional products from other categories along with their actual product purchase.
For Example: After adding a laptop in cart, on proceeding to next page, customer is asked to add a printer with their order. Since, it is related to the computer accessory, therefore, chances are customer get interested in buying both the products.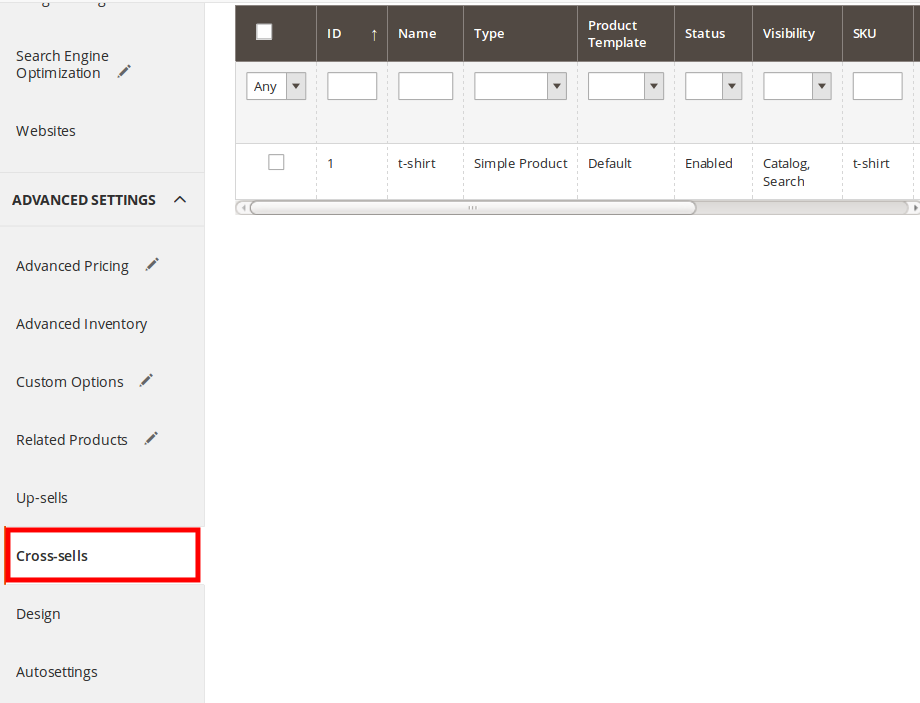
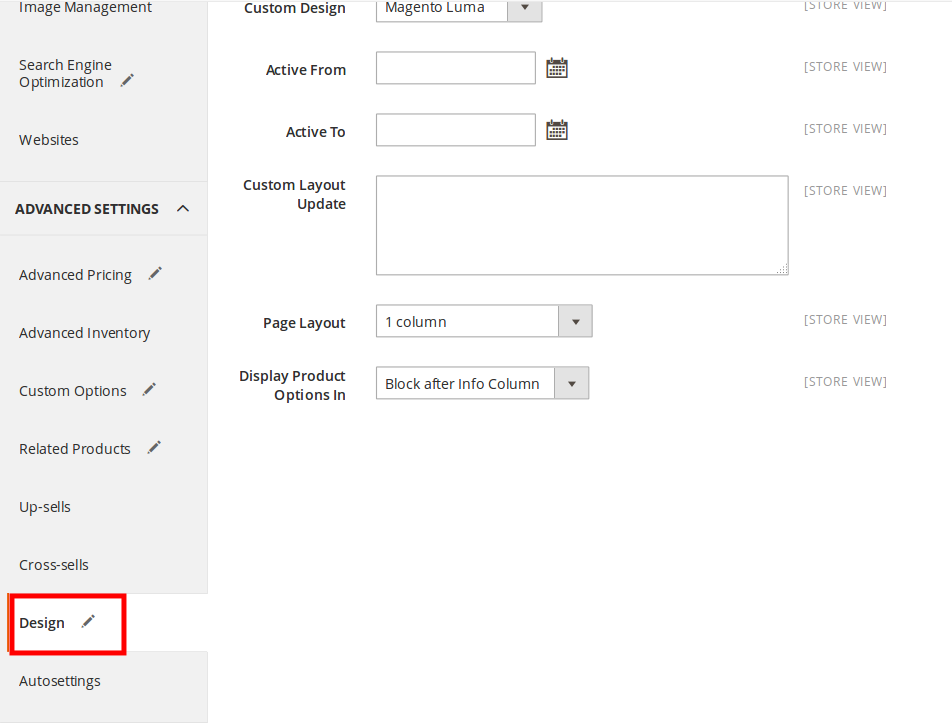
2.7 Design Tab
To change the storefront design or how your products should be displayed at your store are all managed using the Design tab.
2.7.1 Design
Visit Products>>Catalog>>Advanced Settings>>Design
2.7.1.1 Custom Design: Select any one design option to apply on your product to be displayed on store.
2.7.1.2 Active From/Active To: Select the date range from the given two date calendars to define when the design will get active and inactive.
2.7.1.3 Custom Layout Update: You can add custom coding to change the design layout.
2.7.1.4 Page Layout: Select any one option that will change the storefront design view for the product on the given date.
2.7.1.5 Display Product Options In: Select any one option to display product options accordingly.
2.8 Autosettings Tab
2.8.1 Autosettings
Visit Products>>Catalog>>Advanced Settings>>Autosettings
2.8.1.1 Short Description: Add a short product description in this field. This will be displayed at the storefront and also as the Quick Overview. You may use the text formatting options to change the text style, size, color and so on.
2.8.1.2 Visibility: You can set the level of product visibility that defines how the product will be visible throughout your store. Its options are:
- Not Visible Individually: This means the product will be displayed only as associated product but now display in catalog.
- Catalog: This will display your product in the catalog but will will not include in the ‘Search’ results.
- Search: Contrary to Catalog, this option will display the product in the search results, but not in catalog.
- Catalog, Search: The product will be listed in both the catalog and search results.
2.8.1.3 Set Product as New from Date: Selecting or typing the date in this field allows you to define a date when the product will start appearing as ‘New Product’ in the Home Page.
2.8.1.4 Set Product as New to Date: Selecting or typing the date in this field allows you to set the end date range until when the product will be appeared as ‘New Product’ in the Home Page.
2.8.1.5 Country of Manufacture: Select the country name from the dropdown where the product is manufactured.
2.8.1.6 Allow Gift Message: Selecting ‘Yes’ will allow providing the facility of including the gift message in the Shipping method during the checkout process, whereas, ‘No’ will not allow entering any gift message. After placing the order, the gift message will be displayed on Order Information Page in the admin panel.
Note:
Uncheck ‘Use Config Settings’ before proceeding saving the details.
2.8.1.7 Click on ‘Save’ button to save the details.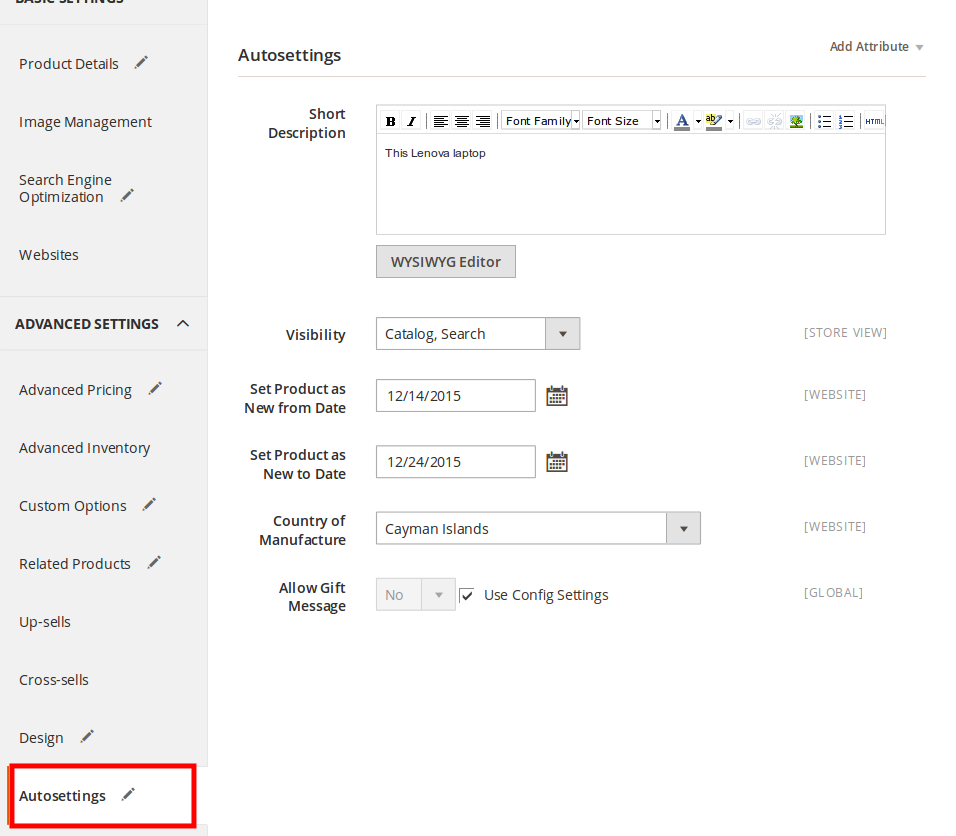
2.9 Product Reviews Tab
The Product Reviews section will allow you to view the product review posted by the customer. You may check the latest status of the product review. Moreover, you may also approve or disapprove the give review.
2.9.1 Product Reviews
Visit Products>>Catalog>>Advanced Settings>>Product Reviews
2.9.1.1 All product reviews will be displayed in this section.
2.9.1.2 Click on the particular product review to view it.
2.9.1.3 Author: Displays the name of author who have posted his review.
2.9.1.4 Status: You may approve the review to display it with your product at store, by selecting ‘Approve’ option from Status dropdown. To disapprove it, select ‘Not Approved’. If no action is performed on the review, then by default it will display ‘Pending’.
2.9.1.5 Click on ‘Save’ button to save the review.
2.9.1.6 To delete it, click on ‘Delete Review’ button.
This will update the status in Reviews screen.
Are you facing problems while adding new products in Magento 2.0? Or want to add custom option? Talk to our certified Magento consultants and get it done. Contact us now!


Related posts:
December 23, 2015
December 15, 2015


When I started adding new products in my Magento 2 based store, I was unsure about some of the tabs which appeared on the settings page. And I was searching for some tutorial which can help me out with this process. Thanks to your tutorial, I can now add my new products into the store. I highly appreciate the way you have explained everything in detail.