 Experts Need expert help? Don’t hesitate to talk.
This tutorial is divided into two posts. This is a first part of this post. Here, I will cover basic settings of adding and managing the products at your Magento website in a new version, Magento 2.0. Visit Part 2 of this post if you are looking for the advance setting of adding the product in Magento 2. After reading this entire tutorial, you will know how to do settings of your products to add in your catalog and manage them.
To begin with any functionality, the first log in to your Magento Store using your login credentials.
How to Add Products in Magento 2?
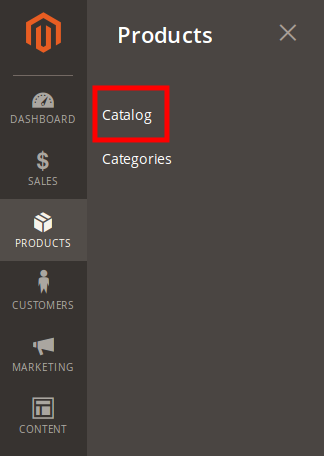
Visit the navigation panel on the left and click on ‘Products’ icon. Products dropdown menu will open, click on ‘Catalog’ menu option.
To add a product, Select ‘Simple Product’ option from ‘Add Product’ drop-down.
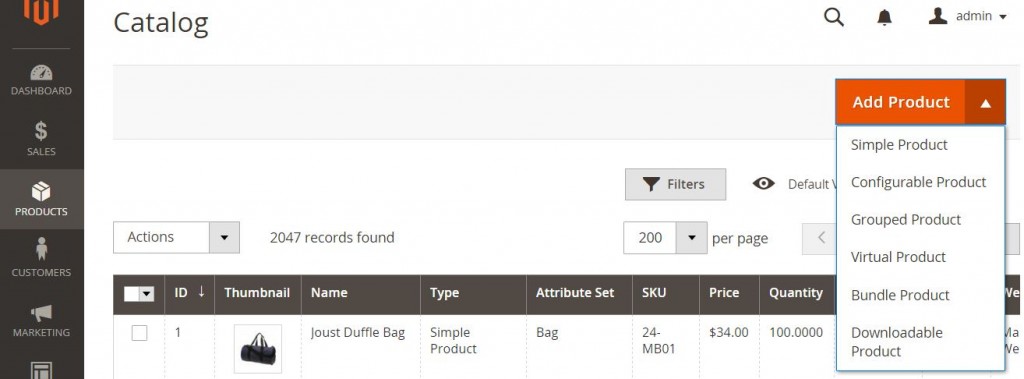
New Product Screen opens. This screen allows you to add and manage products. It has two main sections ‘Basic’ and ‘Advanced’ settings.
Note:
When you start working ahead on recording the data, then ‘Use Config Settings’ checkbox is available in several places. This refers to Magento default settings. So, if you want to continue with the Magento default settings, then keep this checkbox checked. To change the default settings, uncheck this checkbox and perform the setting according to your wish.
Basic Settings:
This section allows performing the basic product settings like adding products to your store, assigning an image to product, creating SEO components and configuring product settings for other stores website
1.1 Product Details Tab
This section is used to add the product to your store and record its details. Whatever details you add over here will be displayed on the storefront.
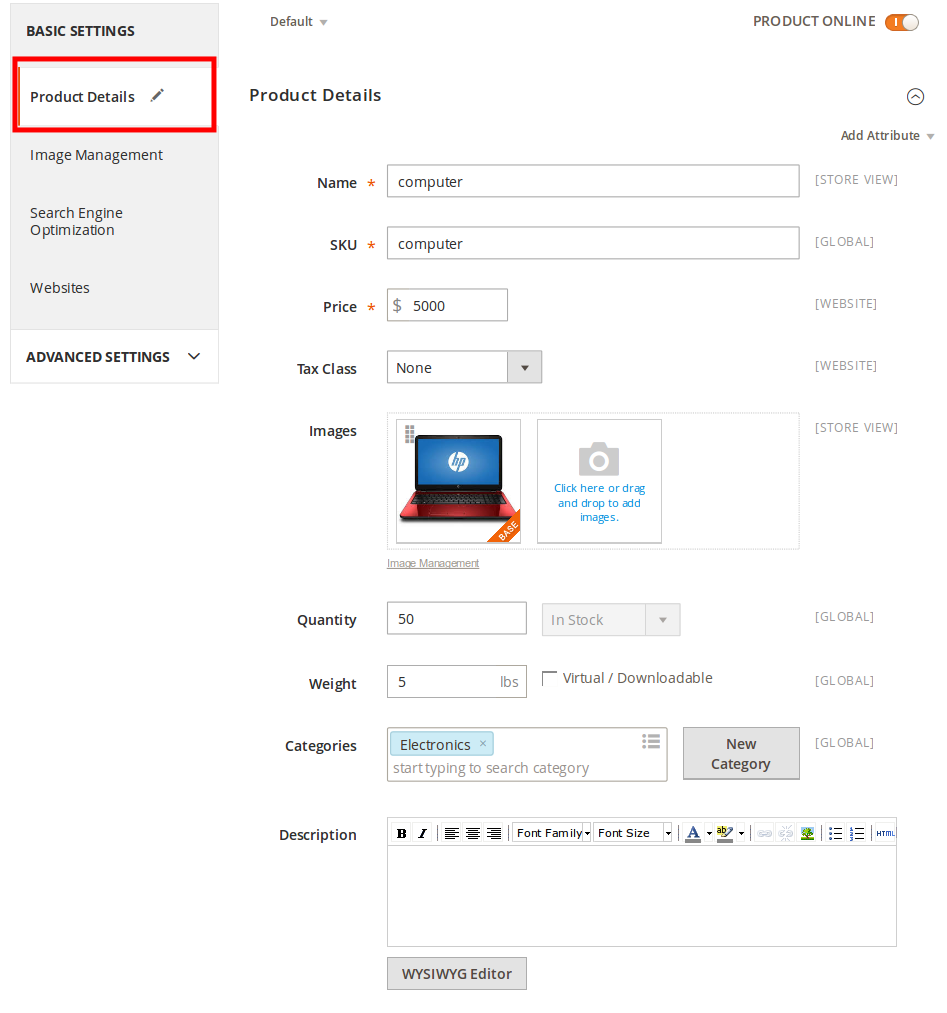
1.1.1 Product Details
Visit Products>>Catalog>>Product Details Tab
1.1.1.1 Name – Enter the product name in this field.
1.1.1.2 SKU – Enter the product SKU which should be unique and can be alphanumeric.
1.1.1.3 Price – Enter the price of the product in this field.
1.1.1.4 Tax Class – If the added product belongs to taxable goods category then select ‘Taxable Goods’ else select ‘None’.
1.1.1.5 Images and Videos – Add related product image(s) by clicking on ‘Click here or drag and drop to add images’ link. Or add product video in this section by clicking on ‘Add Video’ button.
1.1.1.6 Quantity – Enter the number of products available in your stock. If the value is >= 1 then select ‘In Stock’. If you don’t want to display this product in the store, then select ‘Out of Stock’ option.
1.1.1.7 Weight – If the product is weighted then select ‘Yes’ and enter the weight in the given text box else select ‘No’.
1.1.1.8 Categories – Select a product category from this field. If the particular category does not exist, then you can add a new category by clicking on ‘New Category’ button, enter ‘Category Name’ and select ‘Parent Category’.
Whatever new categories will be created in this section will be automatically displayed in Products>>Categories. The category options are created and managed by this section Products>> Categories.
1.1.1.9 Description – Enter the product description in this field. Use the formatting tools to change the text format. To use more enhanced text formatting tools, click on ‘WYSIWYG Editor’ button and save your text.
1.1.2 Downloadable Information
This section allows you to attach any downloadable material with your product. The downloadable product can be music, ebook, videos etc.
1.1.2.1 Is this Downloadable Product? : If you want to attach any product information that can be downloadable by the user, then check this check box. This will display two options below: Links and Samples.
1.1.2.1.1 Links: This panel allows the user to download the items along with the product after purchasing once the product order is confirmed.
A) Title: Enter the link title.
B) Links can be purchased separately: If you want the downloadable items to be purchased together, then check this check box. For example: If you have attached 3 video files. Now, if this-this option is selected, then the user can buy each video file separately, however, if this option is not selected, then it will be mandatory to buy all files together.
- Title – Enter the link title.
- Price – Enter the price of the downloadable file.
- Attach File or Enter Link – You can attach files by two ways:
a) Select File and click on ‘Browse Files’ link to browse and select a file to attach.
Or
b) Select URL and enter the attachment URL. - Sample – Browse or enter URL of files to be downloadable.
- Shareable – If Yes, then this will allow only the registered users to download the sample file, else, guest user can also download this file.
- Maximum Download – You may limit the number of downloads of this file by entering a value in this field. To allow unlimited download of this file, check ‘Unlimited’ checkbox.
- Add a new link – To add new downloadable item link, click on it.
1.1.2.1.2 Samples: To provide product sample files at the storefront, attach those files in this section. When customer view the particular product, then these files will be displayed to download
1.1.3 Configurations
1.2 Images and Videos
This section is used to add the product images videos. You can use this section to display the videos showcasing the products, features or benefits etc.
1.2.1 Images and Videos
Visit Products>>Catalog>>Images and Videos
1.2.1.1 Click on ‘Add Video’ button to add a video.
1.2.1.2 New Video Screen opens.
1.2.1.3 URL – Enter video ‘URL’, Title and Description in their respective fields.
1.2.1.4 Preview Image – Upload image by clicking on ‘Choose File’ button.
1.2.1.5 Identify the image role by selecting the appropriate options.
1.2.1.6 Click on ‘Save’ button to save the details.
1.2.1.7 To cancel any entered detail, click on ‘Cancel’ button.
1.2.1.8 You may also search a video by using the filter given above.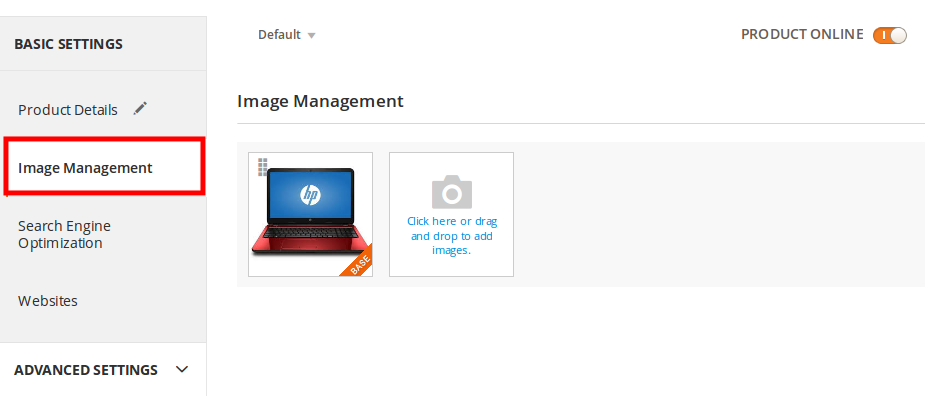
1.3 Search Engine Optimization
By default, Magento is designed to be SEO friendly. You only need to enable the SEO settings as shown below:
1.3.1 Search Engine Optimization
Visit Products>>Catalog>>Search Engine Optimization
1.3.1.1 URL Key – Enter your URL key.
1.3.1.2 Meta Title – This is your product’s page title.
1.3.1.3 Meta Keywords – This is the keywords that are related to your product.
1.3.1.4 Meta Description – Enter few lines of description for your product.
Although, it will not be displayed anywhere on your store, but, will be used by the search engine to list your website in their search result.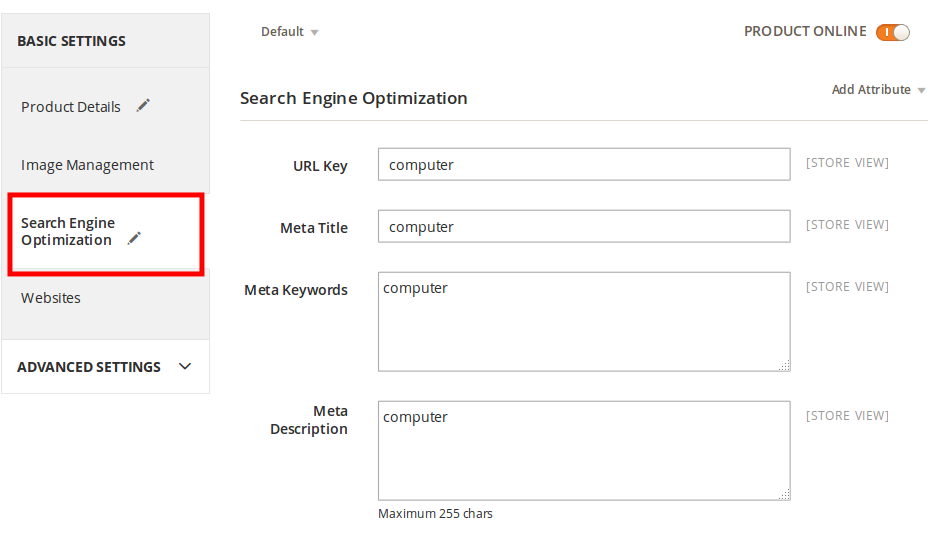
1.4 Websites Tab
This option is useful for those who have multiple websites. It will display the list of all stores associated with the admin account. This will allow the user to display the particular product with its settings on it the selected stores. For that, a user needs to select the particular store name by checking their respective checkbox.
Next part of this tutorial covers advanced settings for adding new product in Magento 2.0

Related posts:
December 23, 2015
December 15, 2015


Thanks Yogesh for explaining this topic. Now, I clearly know about the basic settings for adding and managing the products in Magento 2. My sister runs a local retail shop but she is planning to take that online. So, once we have developed our website with Magento 2 platform, this tutorial will help us out for managing the products online.