 Experts Need expert help? Don’t hesitate to talk.
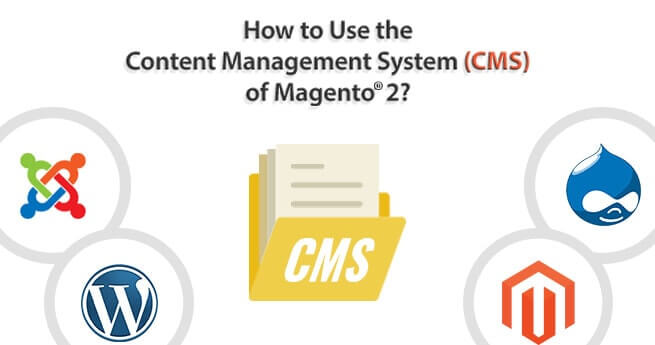
Content Management System (CMS) shapes your website pages. Magento is an open source platform loaded with lots of functionalities to enlighten the online shopping experience. IT is used as an eCommerce platform that is also emerged as a Content Management System. As most of the merchants tries integration of Magento with WordPress, however, Magento itself is packed with its own CMS features. Let us tell you how to utilize it most:
CMS Pages
The CMS pages are available other than Catalog, Products list and Checkout Page. With the CMS pages you can document the simple content. Lets say, its a Terms and Condition Page or your Company’s Policies. It range from simple to design more complex pages including heavy media and images.
Magento gives you What You See Is What You Get (WYSIWYG) editor which is a basic editor where you can enter the text. It is not like complex HTML codings. All you need to enter your piece of code to define how your page should look. You may also select any of its design and template to create your own webpage.
Another benefit it holds is allowing adding SEO meta tags within your codes and URL path to enhance its SEO appearance.
CMS Pages in Magento
-
Login to Magento Admin Panel.
-
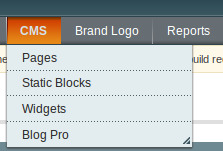
Navigate to CMS Menu.
From here, you can select the CMS elements to define your webpage content.
-
Here, I am selecting Pages to create a webpage for my Magento store.
-
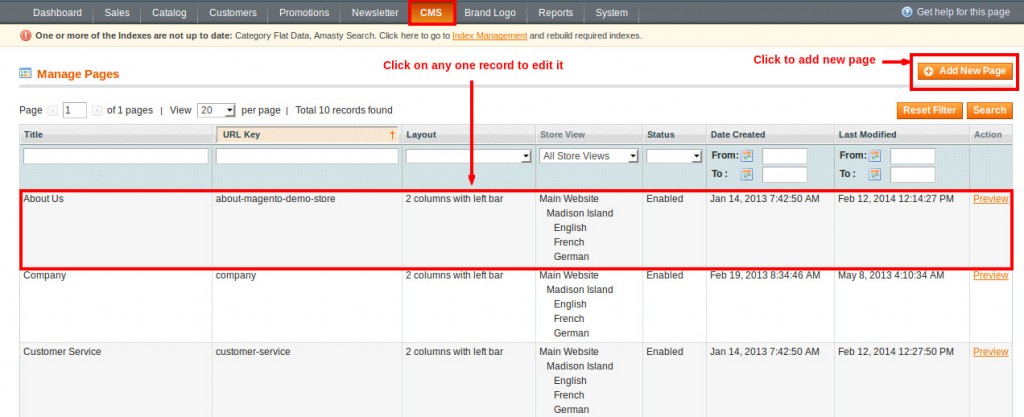
If you already have webpages created for your store, then all the available pages will be displayed on this screen.
-
To add a new page, click on Add New Page button or click on any one page to edit it.
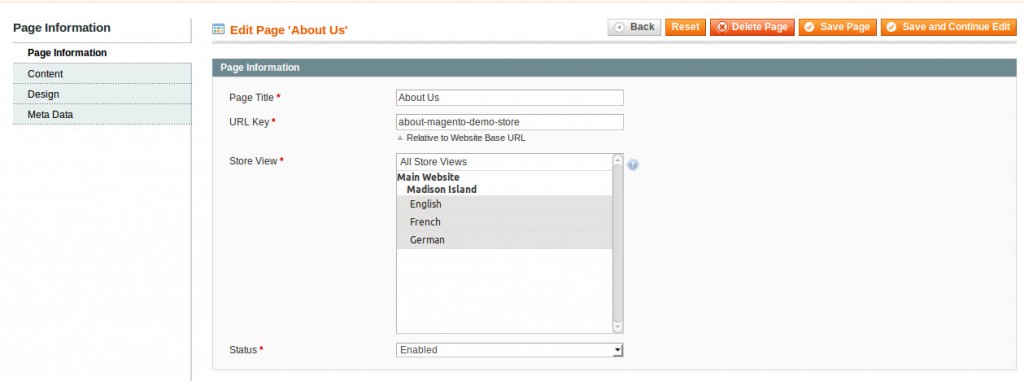
Here, you will get four sections to configure the CMS page.
# Page Information: This section allows you to add your webpage title, URL, store view and enable the page.
-
Page Title: Enter your webpage title which will be displayed at the top of your web browser.
-
URL Key: This is the path of your webpage. Meaning, this URL will be used by the client to access the page.
-
Store View: Select in which language you want to display the webpage.
-
Status: Keep the webpage enable by selecting Enabled option from the dropdown list.
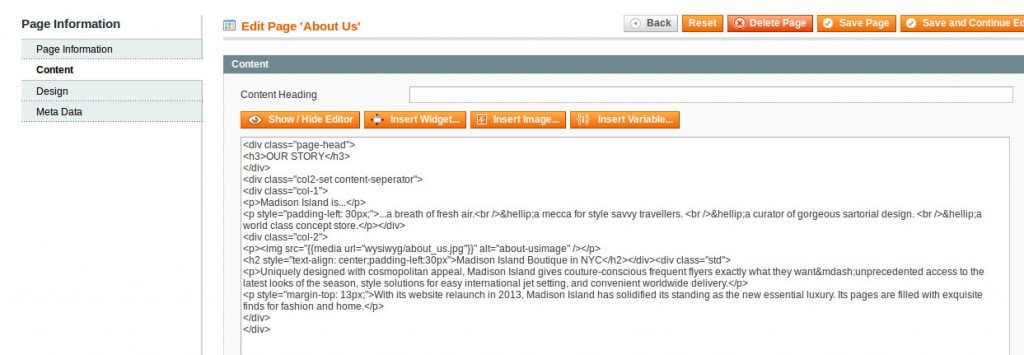
# Content: Here, enter your HTML codes to define the content look of your website.
-
Content Heading: With this, you can define a page heading for your webpage.
-
Editor: This section is used to enter the content in your website. You may do formatting of your content, insert widgets, images and variables.
# Design: The design is all about the layout of the webpage. Its an additional functionality to change your webpage design. You can either select layout from the given option or create your own. Also, you can have your customized design.
Page Layout
-
Layout: From here, you can define number of columns of your webpage.
-
Layout Update XML: You may update the layout by entering the XML code in this text area.
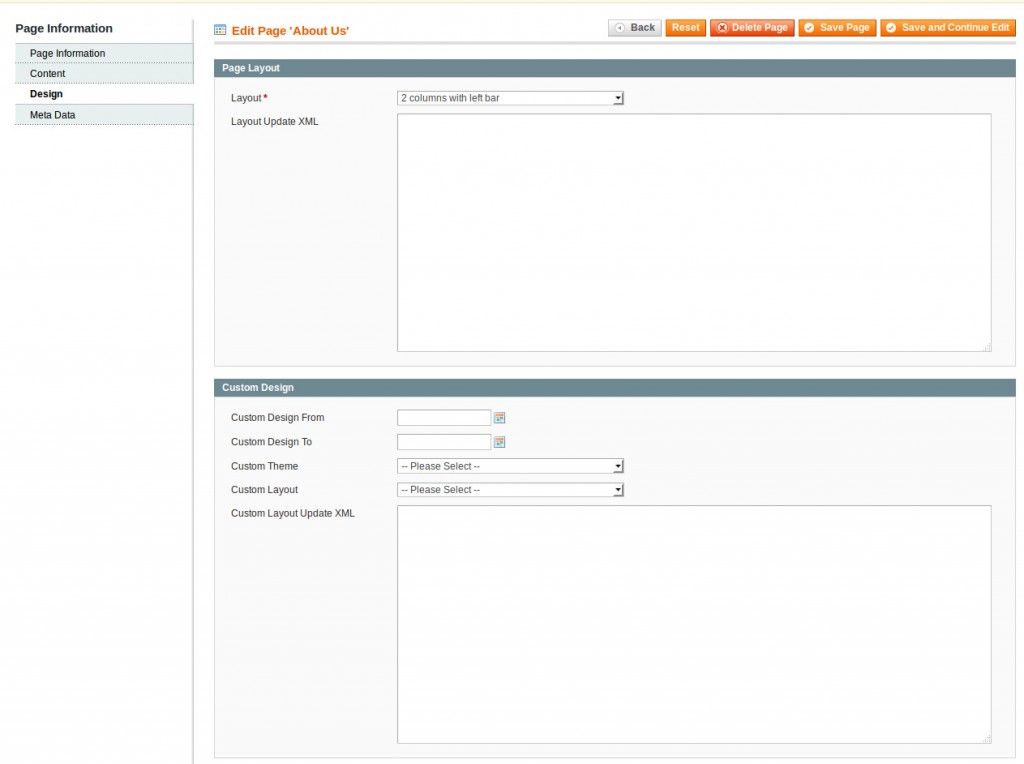
Custom Design
-
Custom Design From/To: Define the date range from when your selected design will be applied to your webpage. Also, if you do not set the date range, then the design will appear always at your webpage.
-
Custom Theme: From here, you can select a pre-installed theme for the webpage.
-
Custom Layout: This is also has the same feature like Layout of Page Layout. However, if you select an option from this dropdown, then the Page Layout option will be override.

# Meta Data: From here, you can perform SEO activities. Define your content keywords and description.
-
Keywords: Enter the keywords related to your webpage.
-
Description: This is a meta description about the content of your webpage. This will be displayed at the search engine result.
Once done, click on Save Page button to save the details.
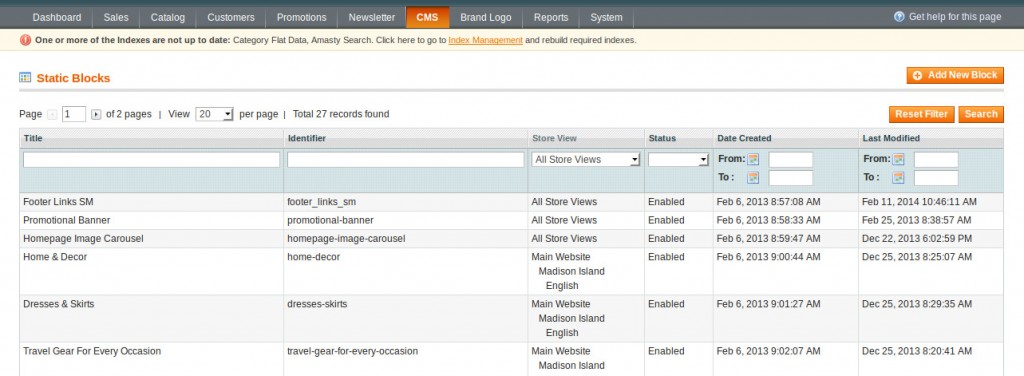
CMS Static Blocks
The CMS Static Blocks cannot be used independently. Hence, to use it, you need to insert it either in the CMS pages, any other system page, Catalog or Product. Similar to CMS Page, you will get facility to enter HTML codings in the given text editor.
To access CSM Static Block, do following steps:
-
Navigate to CMS>>Static Blocks.
-
Now, add a new block by clicking on Add New Block button.
-
From here, configure your block settings.
-
Block Title: This is your static block title.
-
Identifier: This can be same name without any space.
-
Store View: Decide the language in which you want to display the static block.
-
Status: Enable the static block at your webpage.
-
Content: You can enter the content for your static block from this editor. You may also add widget, image and variable from here.
Save the details by clicking on Save Block button.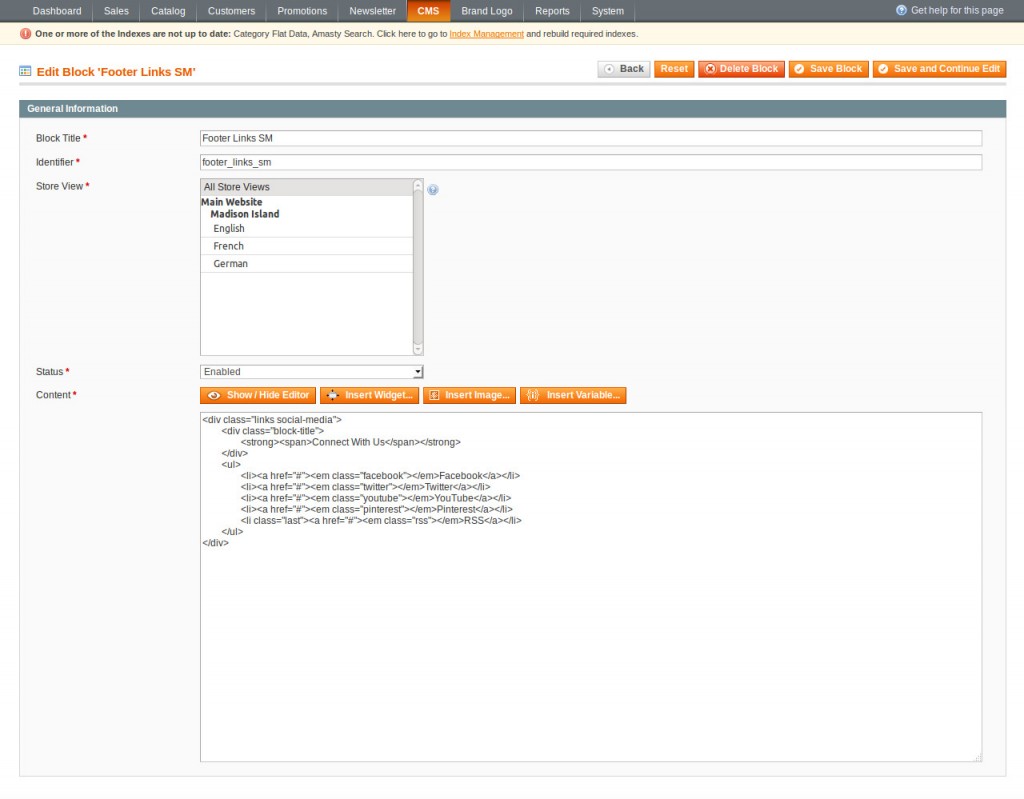
CMS Widgets
Now, this is a section from where you can add additional functionalities to your website. This is basically done to improve your store front-end presentation. You may also call it a customizable block with only difference with the CMS block is that it can be added in the CMS pages.
To do this, follow steps below:
-
Navigate to CMS>>Widgets.
-
Click on Add New Widget Instance widget.
-
Select the type which you want to change and select a theme for the selected type.
-
Type: Select a widget type from this dropdown.
-
Design Package/Theme: Define the theme to apply to the selected type of widget.

-
Click on Continue button.
-
Once you continue, you can define Store frontend properties. Enter your website instance title, store view and sort order.
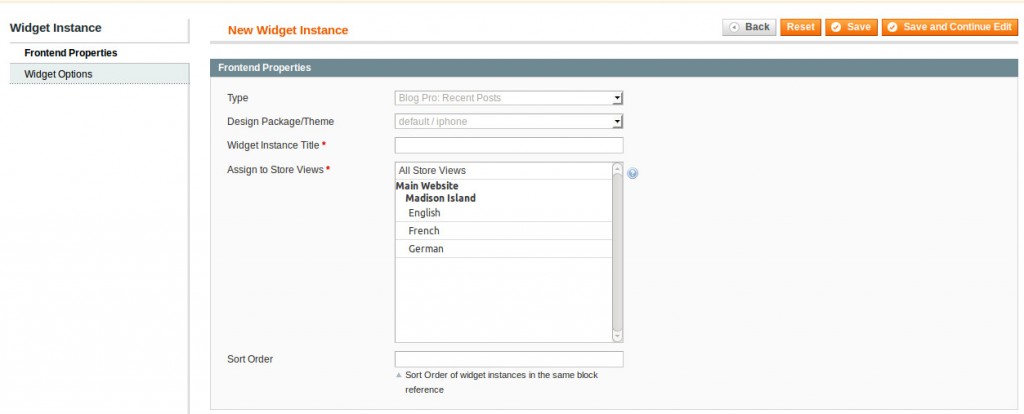
-
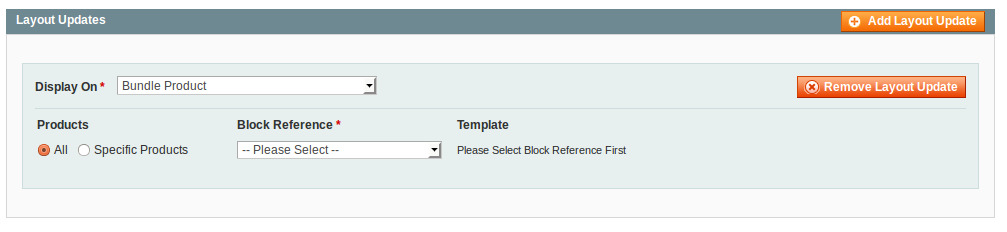
Now click on Add Layout Update button.
-
Display On: From here, decide where you want to display the widget from the dropdown.
-
Block Reference: This the block reference of your layout block where your widget will be added.
-
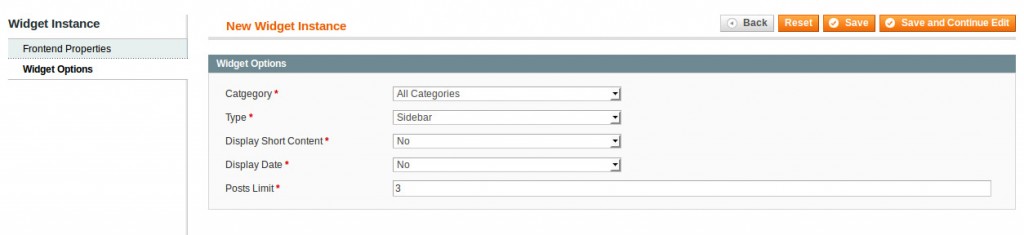
- Configure the widget options according to your preference by clicking on Widget Options from left. Select the widget from here and click on Save button to save.
- Select the widget from here and click on Save button to save.
Magento also allows its user to create a customized module according to their requirement. Contact our Professional Magento Developer to extend your store functionality.


Thank you Jayesh for sharing so much detailed information about the CMS features in a Magento store. Now, I am completely aware about the options under the CMS menu of Magento admin panel.
Nice post!! I have recently moved my store to Magento 2 from the previous Magento version. I knew how to manage the store then but I am not much familiar with the Magento 2. Could you please share how can I manage the CMS in Magento 2?
I am happy that you liked the blog. We have recently published a blog for Magento CMS. You can refer the below given link for our blog where you would learn to use the CMS for your Magento 2 based store: https://www.mconnectmedia.com/blog/use-content-management-system-cms-magento-2/