 Experts Need expert help? Don’t hesitate to talk.
Quick summary
Managing your Magento Store require understanding of the various functionalities provided in this eCommerce platform. An important one is adding products to your Magento Store. When you begin adding the products, then you will notice different types of product options are available to be chosen from. One such type is ‘Configurable Product’ which is used widely in eCommerce stores.
This tutorial will explain what a Configurable Product is and how you can add and manage it.
Let us begin with its definition,
A Configurable Product allows the merchants to offer the products in different variations. Meaning that, a customer get facility to choose the product that specifically meets their requirement. Therefore, instead of creating several simple products with different colors and sizes, Configurable Products give facility to create a single simple product with variations.
For Example: A ‘T-Shirt’ is available in various colors and sizes. Hence, customers are free to choose what color and size of T-Shirt they wish to buy.
How to Add and Manage Configurable Products?
We have already discussed how to add and record data for the different types of products in our earlier post How to Manage Product Part 1 and Part 2. You can refer our blog to know about it in details.
As while creating a Configurable Product, an additional ‘Configuration’ setting is required to be done. This tutorial will guide you how to can perform the configuration settings.
Before begin with, login to Magento Admin Panel using your login credentials.
Steps to Add Configurable Products
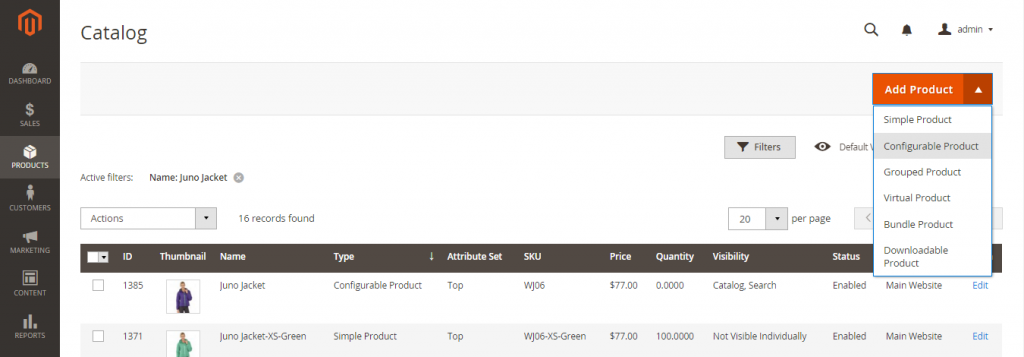
- Go to ‘Product’ > ‘Catalog’. Click on ‘New Product’ drop-down and select ‘Configurable Product’
- Add ‘Product Details’ from this screen. Learn how to add and manage simple product by referring our previous tutorial ‘How to Add and Manage Product’.
This is mandatory section as after adding product only you will be able to perform configurations.
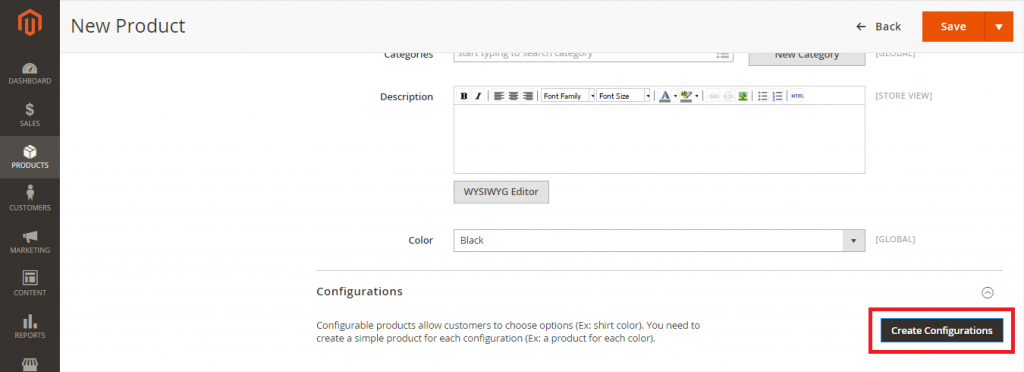
- Scroll down to navigate to ‘Configurations’ section available at the last panel.
- Click on ‘Create Configurations’
1.1 Creating Product Attributes
This screen allows user to create attributes of the configurable products. The attributes defines the characteristic or property of the product. Each attribute contains a value that is used for multiple products. You can create as many attributes you want to describe a product better. Such attributes will be displayed for the particular product later at the storefront.
For Ex: ‘Color’ is a product attribute with a property or value like ‘Red’ or ‘Blue’. Using it you can define a product specifically have a Red or Blue color.
You have two options of adding the attributes:
- Adding from an already available list of attributes (available in the same screen i.e ‘Create Product Configurations’).
OR
- Creating a new attribute and then adding it.

Attributes are created in four steps:
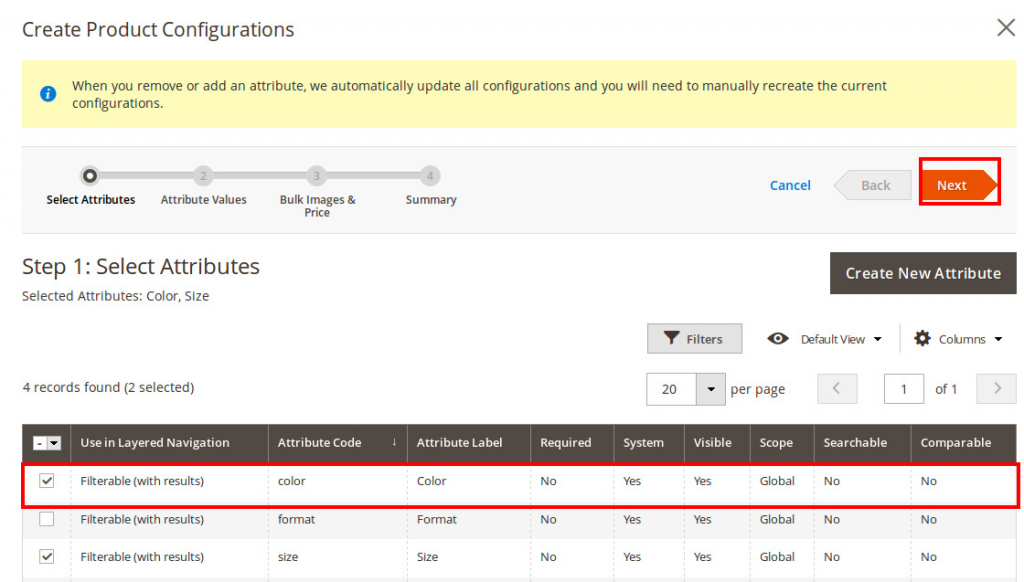
1.1.1 Select Attributes
- Click on ‘Create New Attribute’ button on ‘Create Product Configurations’ screen. New Attribute Screen opens.
1.1.1.1 Attributes Properties
- Default label: Enter the name of the attribute that you want to assign to a product. (Ex: Color, Size).
- Catalog Input Type for Store Owner: Select the input type of the attribute from the list of drop-down options. (Ex: To allow color selection at storefront, keep dropdown list)
- Values Required: To make the attribute selection mandatory for the product at storefront, select ‘Yes’
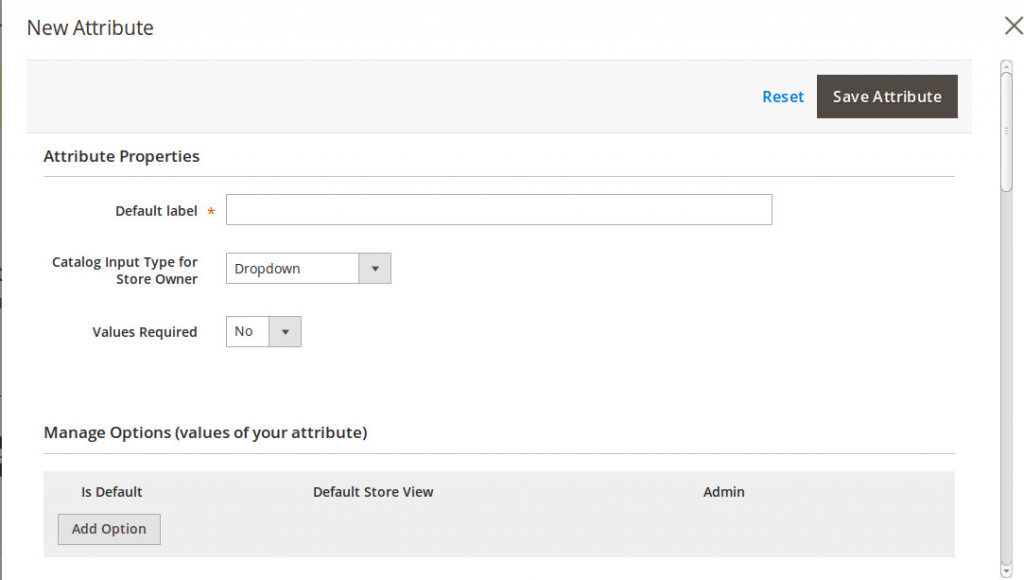
1.1.1.2 Manage Options (values of your attribute)
To create options for the attributes you created above, click on ‘Add Option’ button. You can enter different labels in both the Store View and Admin panel. If Store View field is left blank, then the Admin Panel label will be default label. This option is useful for multi-languages.
- Is Default: To make any attribute option as default option, select this radio button of the particular option.
- Default Store View: Enter the option name that will be displayed at Storefront.
- Admin: Enter the option name that will be displayed at the Admin Panel.
For Ex: For ‘Color’ attribute, options can be color name like Red, Blue, Green and so on and whatever color name you mention in Store View and Admin will be displayed in the product color drop-down on both screen.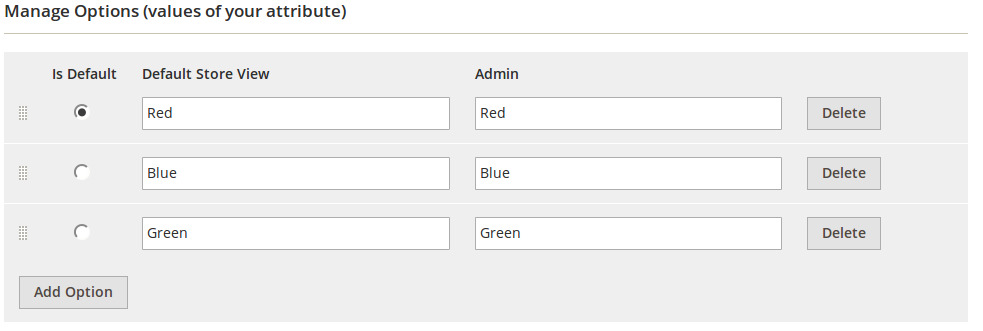
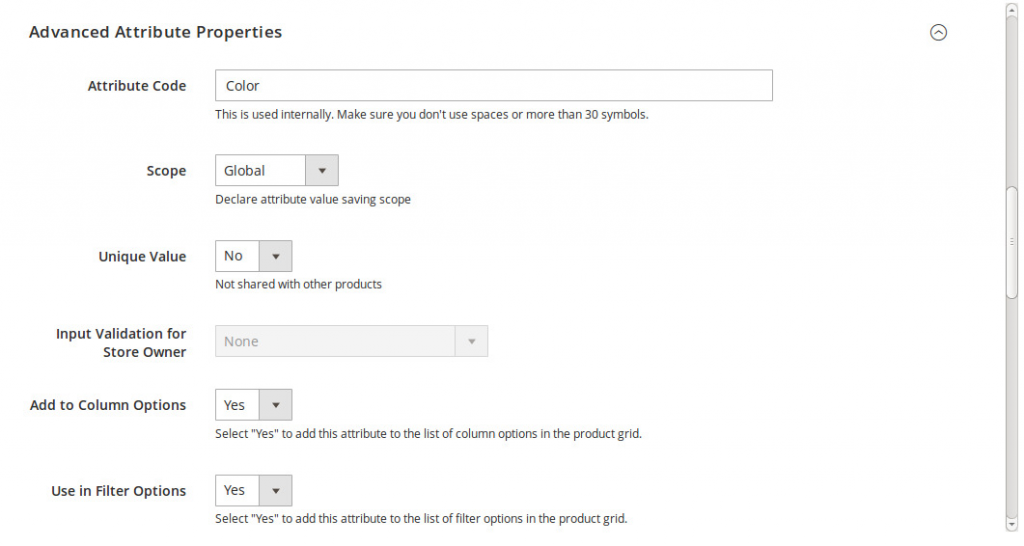
1.1.1.3 Advanced Attribute Properties
- Attribute Code: This is a mandatory field for internal use. The code can be named using letters (a-z), numbers (0-9) or underscore (_) and the first character should always be a letter.
- Scope: You can limit the use of this attribute by selecting any one option; Store View, Admin and Global.
- Unique Value: It is used to prevent data duplication in data entry field. Select ‘Yes’ to enable it.
- Input Validation for Store Owner: This checks the data entered by the store owner. Its options are none/Decimal Number/Integer Number/Email/URL/Letters/Letters (a-z, A-Z) or Numbers (0-9).
- Add to Column Options: Selecting ‘Yes’ will add this attribute in the column options of the product grid in the previous screen i.e ‘Create Product Configurations’
- Use in Filter Options: Selecting ‘Yes’ will add this attribute in the filter section in the previous screen i.e ‘Create Product Configurations’

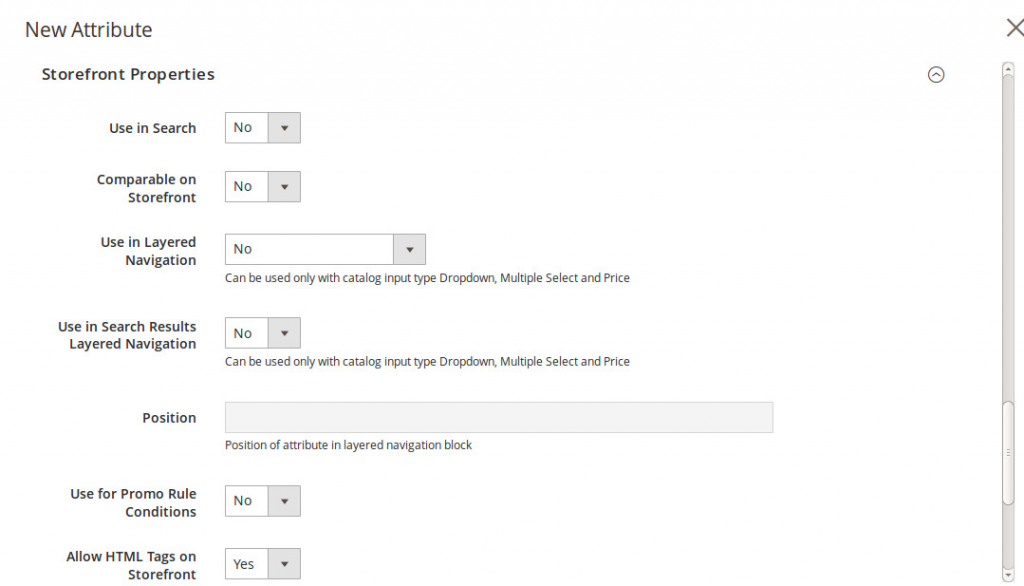
1.1.1.4 Storefront Properties
The properties set for the attribute will be reflected at storefront.
- Use in Search: Selecting ‘Yes’ will allow searching the product with its attribute value in the search box.
- Comparable on Storefront: Selecting ‘Yes’ will allow displaying the product attribute in the comparison list if at least one product contain the same attribute value.
- Use in Layered Navigation (Can be used only with catalog input type Drop down, Multiple Select and Price): Selecting ‘Yes’ will display the attribute value in the layered navigation that is displayed for the category list.
- Use in Search Results Layered Navigation: Selecting ‘Yes’ will display the attribute value in the layered navigation that is displayed for the search result.
- Position: Determines at what position the attribute will be displayed irrespective of other available attributes in the layered navigation list.
- Use for Promo Rule Conditions: This is used to create promotion rules in Magento using the attributed.Ex: You can create a promotion for an attribute ‘Red’ for all products having Red color.
- Allow HTML Tags on Storefront: This will allow the ‘HTML’ tags specified in the attribute values to be honored at the storefront.
- Visible on Catalog Pages on Storefront: Selecting ‘Yes’ will display this product attribute at the storefront in the catalog. If you set this ‘No’ and Comparable as ‘Yes’, then also this attribute will be displayed in comparison chart.
- Used in Product Listing: Displays the attribute in the product listing page depending on the selected design theme.
- Used for Sorting in Product Listing: Displays the attribute in the product sorting list to sort the product depending on the selected design theme.
Click on ‘Save Attribute’ button to save the attribute and proceed further.
- The product attribute will be added in the product grid on ‘Create Product Configurations’
- Select the particular attribute and click on ‘Next’
1.2 Attribute Values
The values that were added for the attributes will be displayed in this section. This section is used to select which attribute values are to be displayed at Storefront.
- Select the value(s) to be displayed for the particular attribute storefront by checking the value check-box.
- You may select any one or more than one values for the given attribute.
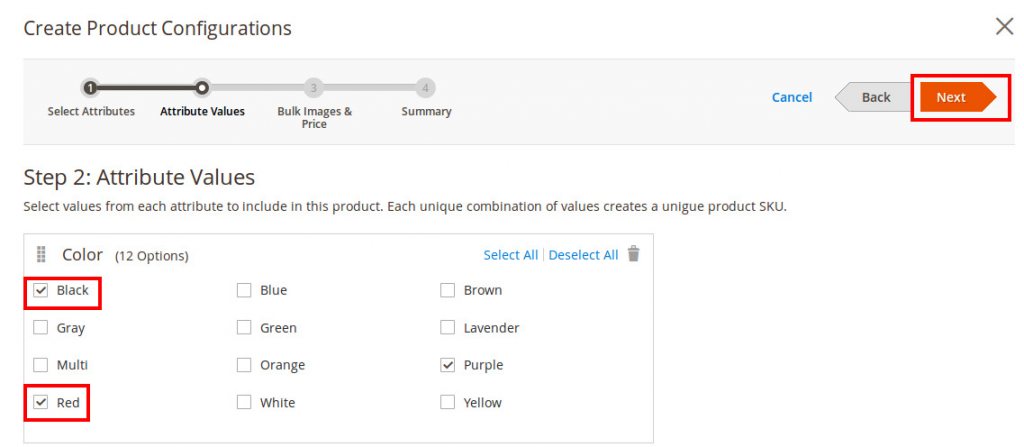
For Ex: For ‘Color’ attribute, values ‘Red/Blue/Green’ will be displayed over here.
- Click on ‘Next’ tab to proceed.
1.3 Bulk Images and Price
Based on the selected ‘Attribute Value’, respective number of products will be created from this screen. This screen will allow adding the images and price for each product.
For Example: If you have selected two attribute values like Black and Red, then two products will be created. You may now define their respective images and price from this screen.
Images can be uploaded in three ways for a product:
1.3.1 Images: This panel allows user to add product images.
- Apply single set of images to all SKUs: This will allow you to add single image in all products.
Selecting this option ask you to add an image. Browse and select image to upload for the product.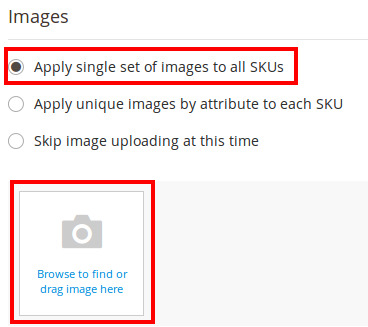
- Apply unique images by attribute to each SKU: This will allow you to add each unique image in all products.
Selecting this option ask to select an attribute based on which the attribute values are displayed. Add images accordingly.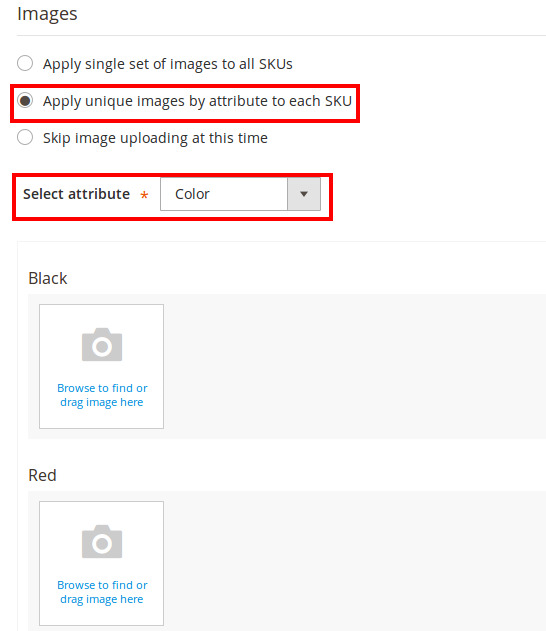
- Skip image uploading at this time: Selecting this option will not allow adding images in products.
You can proceed with next section.
1.3.2 Price: This panel allows user to add product price.
- Apply single price to all SKUs: This will allow you to add single price in all products.
Selecting this option enable a textbox. Enter price of product in this field.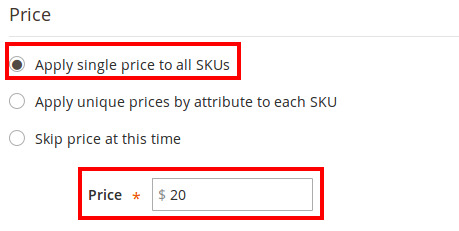
- Apply unique prices by attribute to each SKU:This will allow you to add each unique price in all products.
Selecting this option allows to select an attribute from this drop-down. Enter price of each product in this field.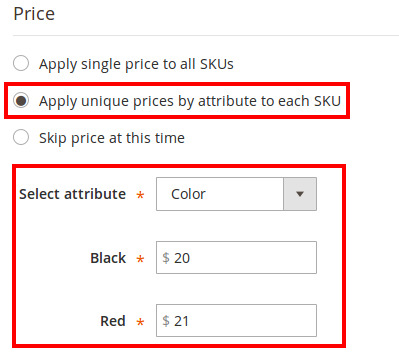
- Skip price at this time: Selecting this option will not allow adding price of the products.
1.3.3 Quantity
- Apply single quantity to each SKUs: This will allow you to add same quantity in all products.
Selecting this option enable a textbox. Enter quantity of the product in this field. 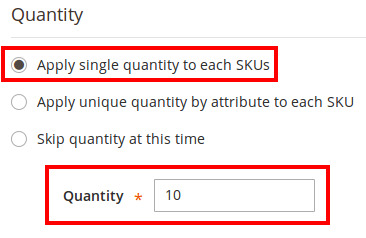
- Apply unique quantity by attribute to each SKU:This will allow you to add each unique quantity in all products.
Select an attribute from the drop-down and enter price of each product. 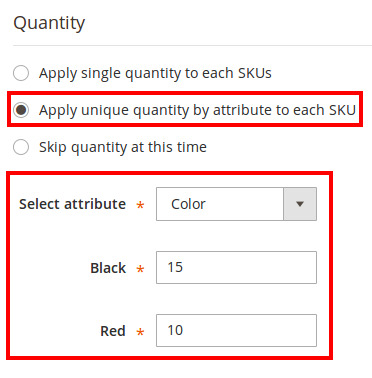
- Skip quantity at this time: Selecting this option will not allow adding quantity of the products.
- Click on ‘Next’ tab to proceed to next step.
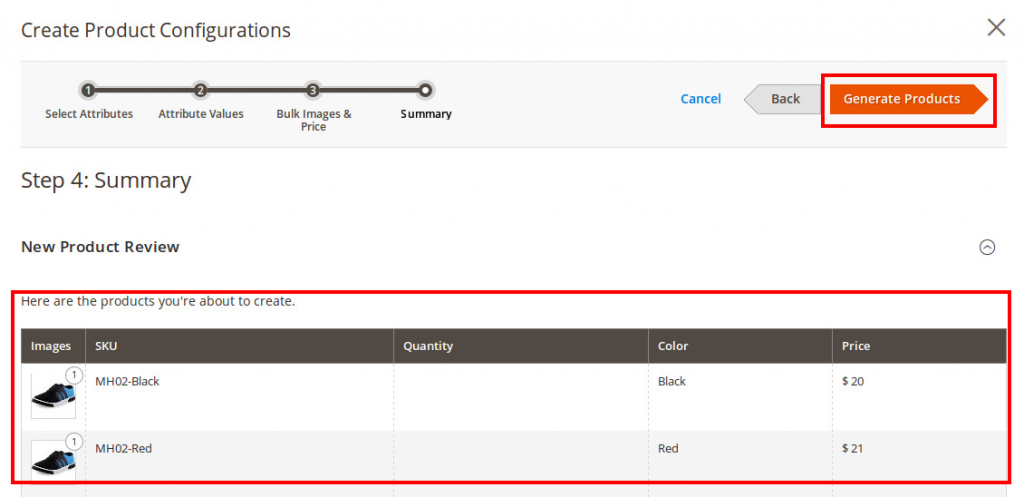
1.4 Summary
Based on the selection in the previous screen, list of products will be displayed over here.
- Click on ‘Generate Products’ button to create products for the same.
- If anytime you want to go back to edit any settings, click on ‘Back’
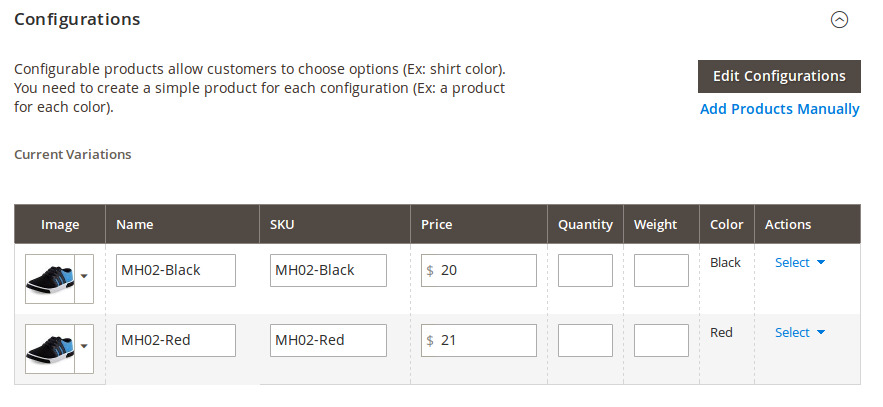
The product created in this section will be displayed in ‘Configurations’ panel of Product Screen.
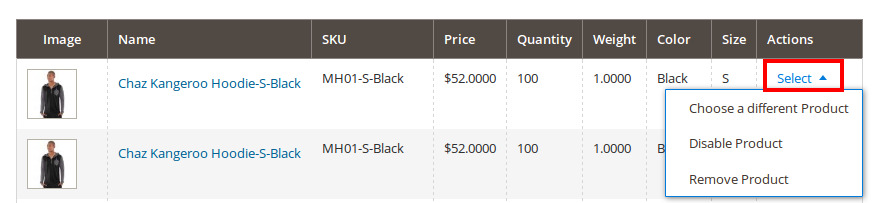
1.4. 1 Associated Product
Now, anytime you want to replace or delete a product, then use the ‘Actions’ option from above screen.
- Click on ‘Select’ link and choose an appropriate option.
- Choose a different product: To replace the current product with other available products, click on this link and select a product from the given list.
- Disable Product: To disable a product to hide it at storefront, select this option.
- Remove Product: To permanently remove this product, click on this option.
Click on ‘Save’ button on product screen to save the product configuration.
Now, when you open the product next time, then the particular product attributes will be displayed on the Product Screen.
You are all done. How the product displayed at Storefront depends on how you have set up it in your Admin Panel.
We have published many other Magento 2 tutorials. Check our how to category to learn more about Magento 2 back-end or contact us for any Magento 2 Help.


Good tutorial. Every step is described in detail and easily understandable. This is good for a beginner.
Thanks Silviya for your response.
Nice Tutorial.
I wonder why applied tier prices of simple products does not appear on the product detail page?
Sir very good tutorial. Sir how to install or how to paste extension key for theme. eg 1.9 we use to connect with magento extension for geting extension key . Thanks sir
Hi Why Configurable associated simple products option price dosent update on products option selected .