 Experts Need expert help? Don’t hesitate to talk.
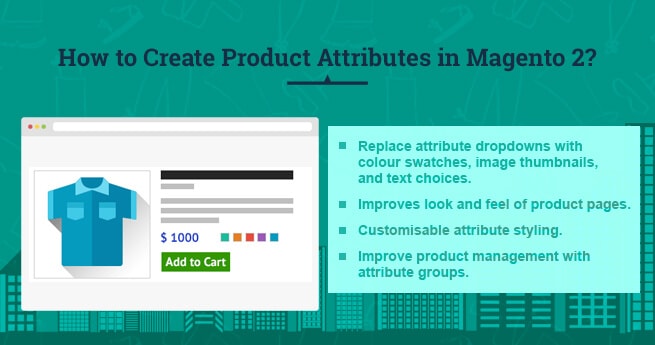
CustoThere are certain things which we like in particular color, shape or size. In the world of online shopping, the products with different variations are very important. Hence, you should create different product attributes and variations to give the multiple choices to choose from for your customers.
What is Product Attribute?
The attributes can be said to the block of the products in Catalog which defines some characteristics of the products.
The product attributes can be created or edited from the Stores menu or Products menu of the Magento® 2 admin panel.
How to create a product attribute?
To create a new product attribute, you need to follow the below given 4 steps in which you have to do the settings one by one:
Navigate to Stores > Attributes > Products. The Products page will open up. Click on Add New Attribute button. 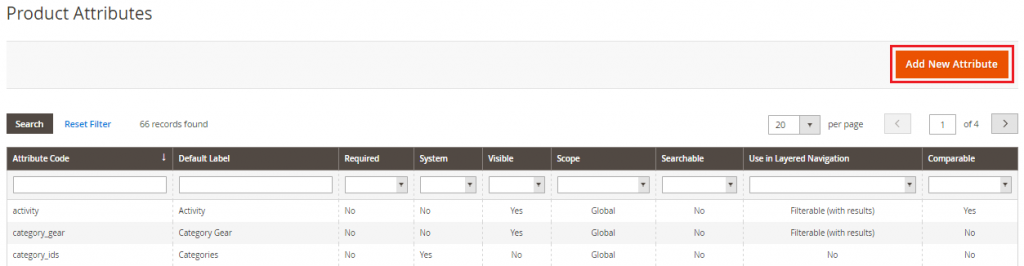
The New Product Attribute screen will open. Under the Attribute Information Menu, perform the settings for all the fields one by one. Let us start with the first one.
Step 1: Basic Properties 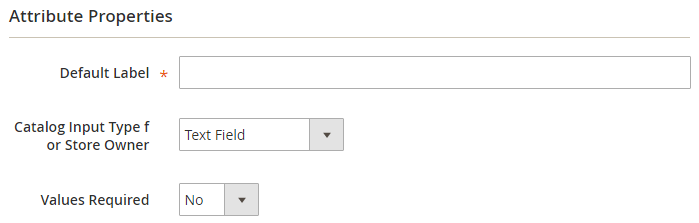
- Default Label: Enter a label in this field which will help in identifying the attribute.
- Catalog Input Type for Store Owner: Enter the Input Type which will be used for data entry.
- Values Required: Select yes in this field, if you want your customers to choose an option before they purchase the product from you.
Step 2: Advanced properties 
- Attribute code: Enter the code for the attribute which is not more than 30 characters excluding the space.
- Scope: Choose a place where you want the attributes to appear on from your website. The options can be selected from the drop down menu.
- Default Value: Give a default value to this attribute in this field.
- Unique value: Apply the value as Unique when you don’t want to share this value with other products.
- Input Validation for Store Owner: Select the type of data in this field for running the validity test of the data.
- Add to Column Options: Choose yes in this field for adding this attribute in the list of columns in the product grid.
- Use in Filter Options: Select yes in this field for adding this attribute into the list of filter options in the product grid.
Step 3: Manage Labels 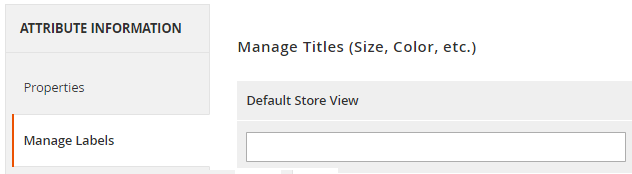
- Default Store View: Enter the title in this field which will be used as the default label.
Step 4: Storefront Properties 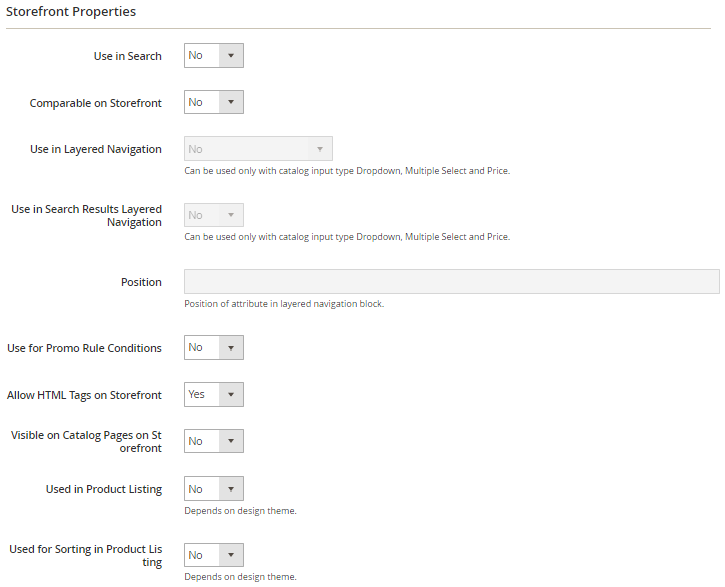
- Use in Search: Select yes if you want the attribute to be used in the searching of products.
- Comparable on Storefront: Select yes if you want to add this attribute for product comparison.
- Use in Layered Navigation: Select yes if you want to allow the attributes to be filtered in layered navigation.
- Use in Search Results Layered Navigation: Select yes to show the attributes in the search results of the layered navigation.
- Position: Set the position this attribute to appear in the layered navigation block.
- Use for Promo Rule Conditions: To apply this attribute for the price rules, select yes in this field.
- Allow HTML Tags on Storefront: Choose yes to enable the HTML format for the text on the storefront.
- Visible on Catalog Pages on Storefront: Select yes to make the attributes visible in the catalog listing pages on the storefront.
- Used in Product Listing: Choose yes in this field to add the attributes in the product listings.
- Used for Sorting in Product Listing: Select yes to make the attributes as the sorting parameter on the Product listing pages.
Click on Save Attributes to apply the changes on the storefront.
How to Create Attribute Sets?
Navigate to Stores > Attribute > Attribute set. 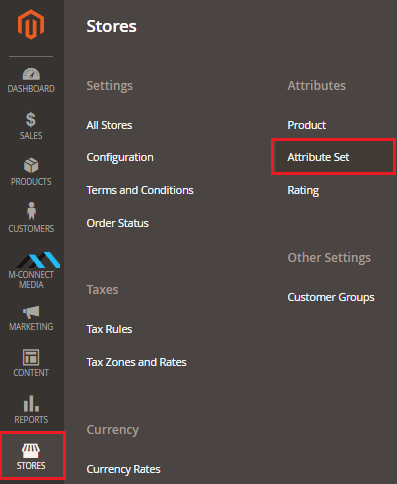
Once you click on Attribute set, the screen will open. 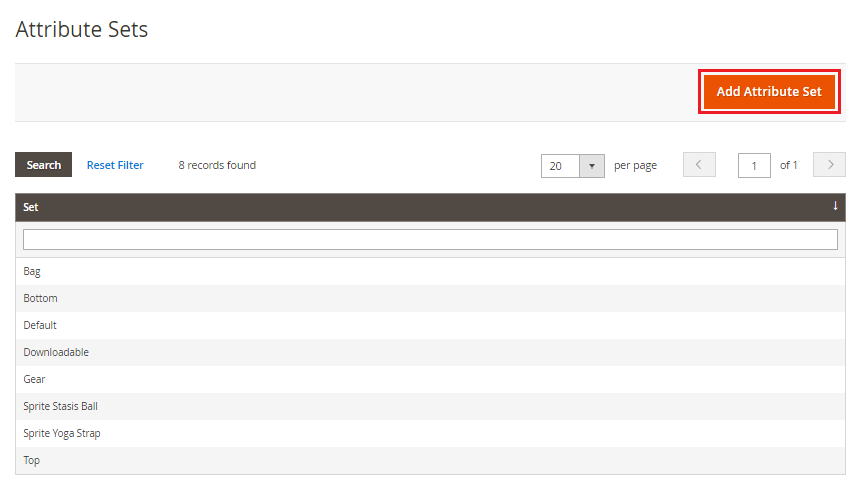 Click on Add Attribute Set button. New Attribute Set Screen will appear.
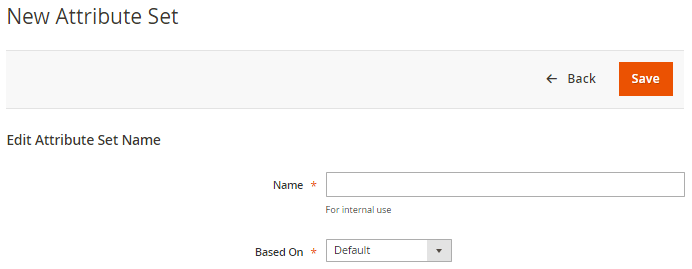
- In the Name field, give a name to the attribute set.
- Select a value for Based On field from the drop down. This will be used as a template.
It comes to the end of the tutorial for creating the products attributes in Magento® 2. If you have any doubts in the above steps or you are facing any problem while following the steps, then don’t hesitate to contact our Magento® Programmers . We will be really happy to assist you and clear your doubts about the product attributes configuration.


With the help of this article I learnt about adding and editing different product attributes. Now, I can utilise that on my store as well. I was thinking of offering variations in products because as you have also mentioned in your comments that some people like a specific color in some their favourite products. Thanks for this tutorial!
Great article! Thanks for sharing the detailed steps.