 Experts Need expert help? Don’t hesitate to talk.
Quick Summary
You have learned the configuration process for the DHL Carrier and FedEx Carrier in our two previous blogs. You can use the UPS carrier shipping as it supports more than 220 countries in the shipment of products. However, to take advantage of its flexibility, we are here with the configuration steps of UPS carrier shipping.
Steps involved in the configuration of the UPS carrier:
- Generate an account in UPS carrier shipping
- Enable UPS
- Define the Packaging and container description
- Specify the shipping handling fees
- Allot the allowed shipping method
- Assign to the applicable countries
6 Steps to Configure UPS Carrier in Magento 2
Step 1: Generate a UPS Shipping Account
Before you proceed for performing the configuration of UPS carrier, you need to create a shipping account on the official UPS carrier website.
Step 2: Apply UPS
After you have created the shipping account with UPS, navigate to Stores > Configuration > Sales > Shipping Methods > UPS. 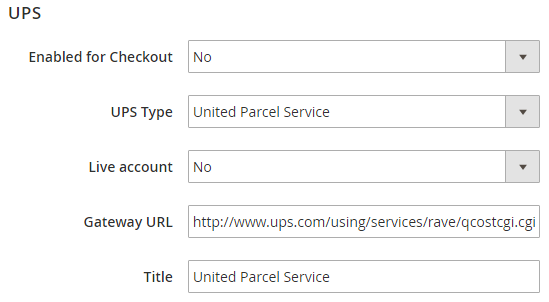
- Enabled for checkout: Manage to allow the UPS carrier shipping method on the store by selecting yes or no in this field.
- UPS Type: There are two types of UPS services: United Parcel Services and United Parcel Services XML. You can select any one of the services. When you select United Parcel Services, you need to enable or disable the Live account, and if you choose parcel united Services XML, then you need to provide the details of Access License no., User ID and Password.
- If you select United Parcel Services XML in the above field, then apart from Access License no., User ID and Password, you also need to provide some other information:
- Mode: By selecting Live Mode, you can enable to send the data to the system for UPS shipping.
- Gateway XML URL: This is the URL for sending requests for the XML file.
- Origin of the Shipment: Select one of the options from the drop down to mention the shipment origin.
- Enable Negotiated Rates: Select yes or no to enable or disable the negotiations in the shipping rates.
- Live Account: Select yes to keep the UPS shipping carrier in Live Mode and offer your customers this shipping method or select No to keep it in Test Mode.
- Gateway URL: The gateway URL is normally mentioned as default, and it does not need any changes. This URL helps in calculating the shipping rate for UPS carrier.
- Title: Enter a name for this method which will appear in the shipping section on the checkout page.
Step 3: Insight into Packaging and Container Attributes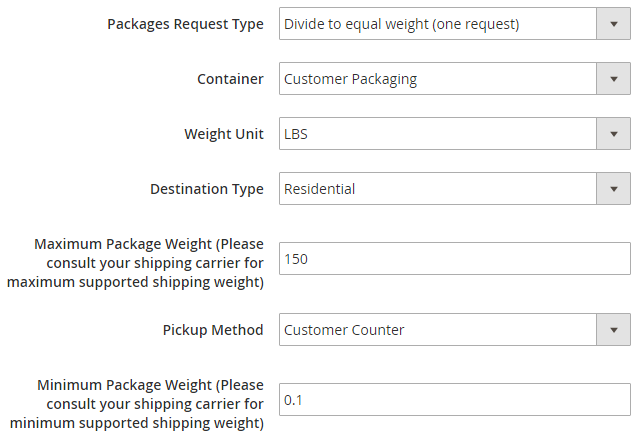
- Packages Request Type: You can choose the package type from ‘Divide to Equal-weight” or “Use Origin weight.”
- Container: Select any of the container types to make it default shipment container.
- Weight Unit: Set the Unit of the Weight in Kgs or lbs.
- Destination Type: Fix the destination type as Residential or Commercial.
- And Min. Package weight: Enter the maximum and minimum weight of the package in the carrier.
- Pickup Method: You can set the pickup method from the given options (Regular Daily Pickup, On Call Air, One Time Pickup, Letter Center or Customer Counter).
Step 4: Specify the shipping handling fees 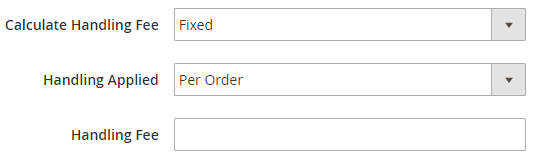
- Calculate Handling Fees: You can set the method for calculating the Handling fee to Fixed or Percent.
- Handling Applied: Specify where to apply the handling fee; Per Order or Per Product.
- Handling Fee: Enter the amount for handling fee in this field.
Step 5: Allot the allowed shipping method 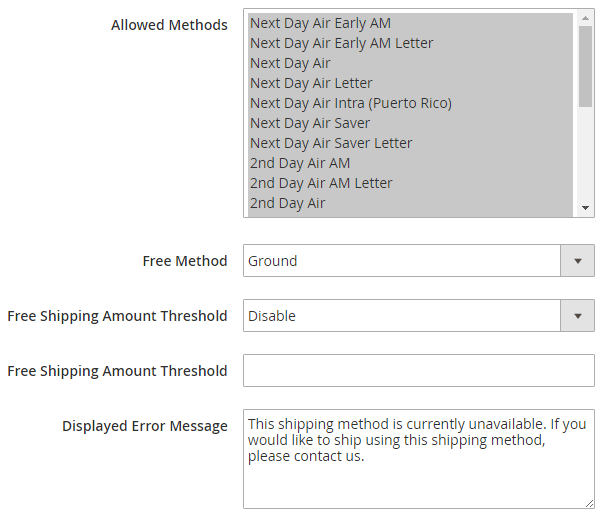
- Allowed Methods: Press Control from the keyboard and select the methods which you wish to offer to your customers.
- Free Method: Choose a shipping method for which you wish to offer free shipping.
- Free shipping amount threshold: Enable or Disable the free shipping for the minimum amount mentioned.
- Displayed Error Message: The system displays an error message if the selected shipping method is not applicable. You can enter that error message here.
Step 6: Assign to the Applicable countries 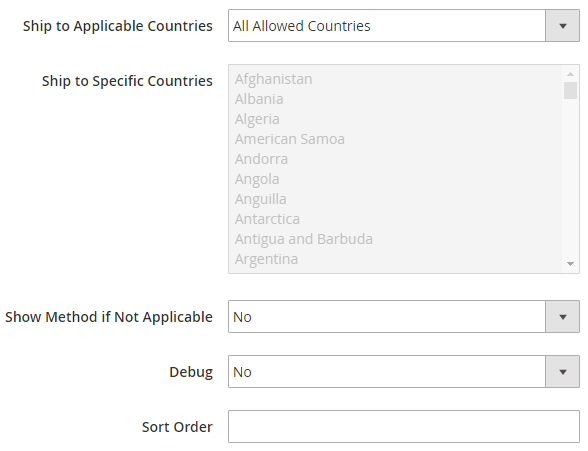
- Ship to Applicable Countries: Choose the shipment for all allowed countries or specific countries.
- Ship to Specific Countries: Select the countries to which you wish to apply this shipping method.
- Show Method if Not Applicable: If you want to display this method even if it is not applicable on the order or product, select yes.
- Sort Order: Set the order for this shipping method to appear on the checkout page.
With the above step, we come to the end of the UPS carrier configuration in Magento® 2 based stores. We look forward that you will also follow our next coming blog post for the last major shipping carrier configuration in Magento® 2.
Are you able to follow the steps shared for the UPS configuration, in the above content? If you have faced any difficulty in doing so, please share with our Magento 2 Experts. They will guide you to proceed with the same.


UPS is the most popular for online order shipping. And I wanted to install and apply this carrier into my store too. Now, I know how to do it. Thanks!
Due to the popularity of UPS carrier shipping in more than 220 countries, I thought of adding this carrier shipping in my shipping methods list. I will go through the configuration steps again and then add this in my store. Thanks!