Pain Points of Large E-commerce Shoppers
Today, the majority of Magento eCommerce stores selling tons of products and allied products like accessories, parts, and so on. These e-commerce sites have a plenty of categories and sub-categories in its navigational architecture.
It renders any standard or advanced navigation scheme or a combination of schemes obsolete. It makes finding the desired products from deep product pages tough even for tech-savvy visitors relying on advanced search field build for in-site search.
It is becoming more intricate when visitors looking the item based on some specific product attributes like size, color, product code, or part number. The above-described scenario is common in the case of manufacturing e-commerce sites, machinery product sites, automobile sites, clothes and apparel sites, and sometimes on big grocery sites of retailers.
Best Product Filtering Solution by M-Connect Media
To cope with the depicted problems, Magento eCommerce developers have developed some modules or extensions with filtering capabilities to find the product or item based on their attributes. Fortunately, M-Connect Media has created the extension on the same line and ease the life of Magento merchants considerably.
Mconnect Product Part Finder – Best Magento 2 Extension to Filter Product with Custom Attributes
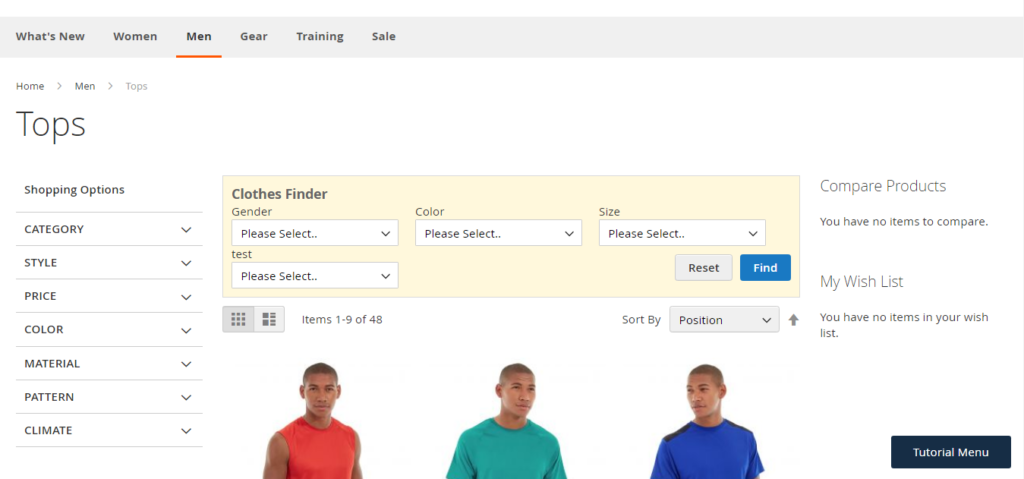
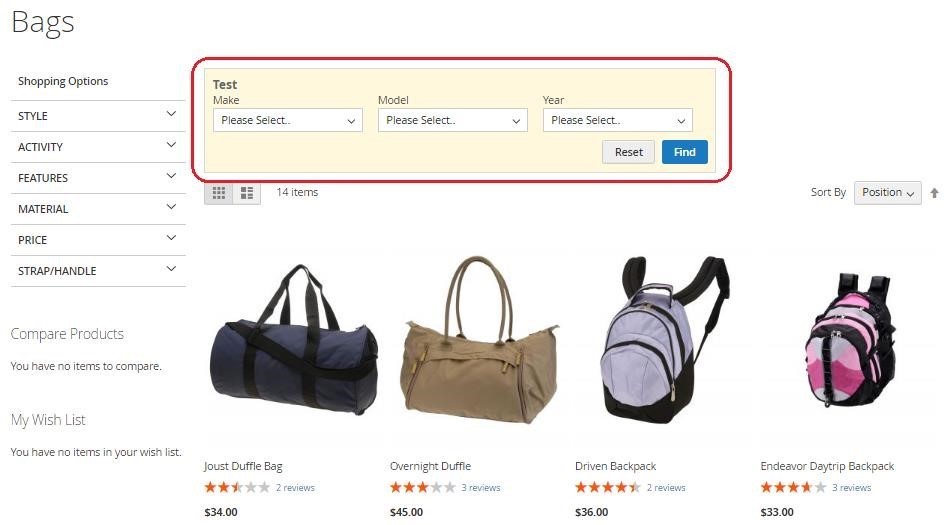
The front-end module of the extension appears as a table with titles of attributes and below each title, a field with the drop-down selection. The easy to use and simplified UI allows any level of users to find the intended product or the parts/accessories of the main product quickly and with the least hurdles.
Part finder extension module at front-end of bags and accessory.
Watch Video: Configuration of M-Connect Part Finder Magento 2 Extension before create new Part finder.
Steps to Add a or Create New Part Finder Extension in Magento 2 Store
If you are a bit more interested to know that, how the extension is working, and what is possible with it on a Magento site, I am going to illustrate things with some screenshots taken from the back-end of the site.
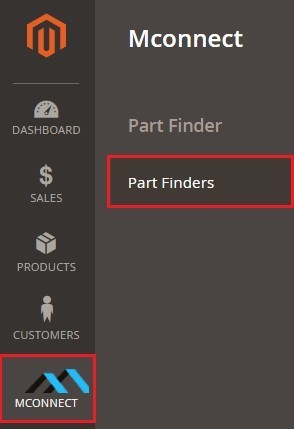
1. Navigate to M-Connect and Part Finders.
2. Now, click on the Part Finders button, the following screen will appear.
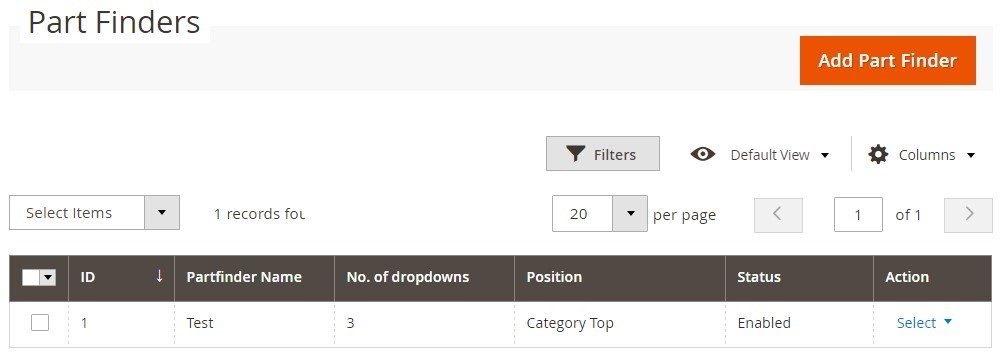
3. On the user interface, you will find a big button ‘Add Part Finder’ on the top-right of the page. Just click on the button, it will lead you to a ‘New Part Finder’ dialog box where the Magento merchants have to fill up the required information, such as
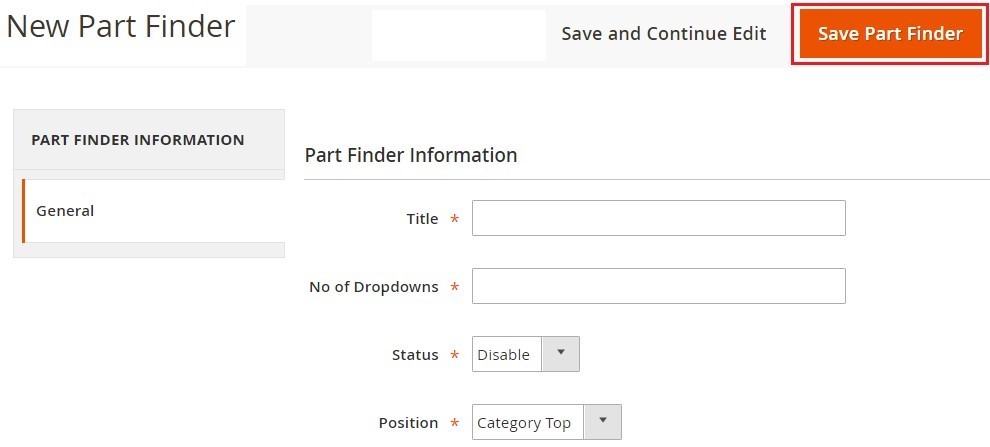
- General Tab
- Fields Tab
- Import Tab
- Products Tab
4. Let’s see each tab with required info.
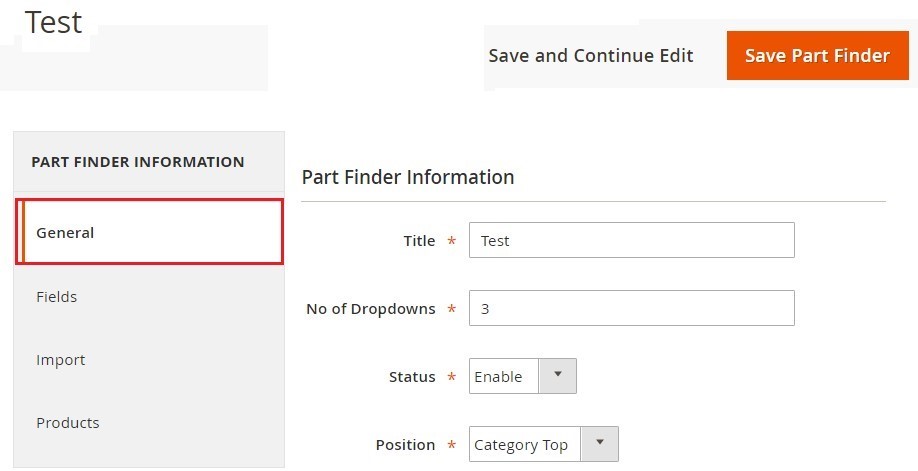
5. It consists of following fields to provide the general info regarding the Part Finder Extension module.
- Title: To give a title to the front-end module.
- No of Dropdowns: To define how many options a Magento merchant need to display in the dropdowns of the front-end module.
- Status: To define enable or disable status of the module on front-end.
- Position: To give the location of the module on front-end page.
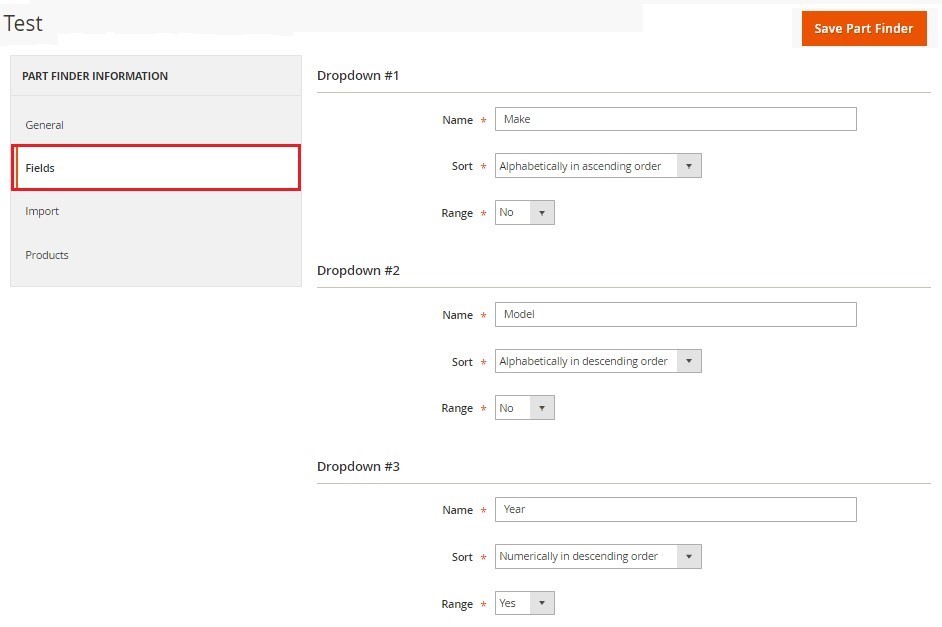
6. It consists of three common fields in all dropdowns.
- Name: To give a name to the corresponding drop-down.
- Sort: To define sorting order for dropdowns like ascending or descending.
- Range: To make a selection for import of the redundant data as a range.
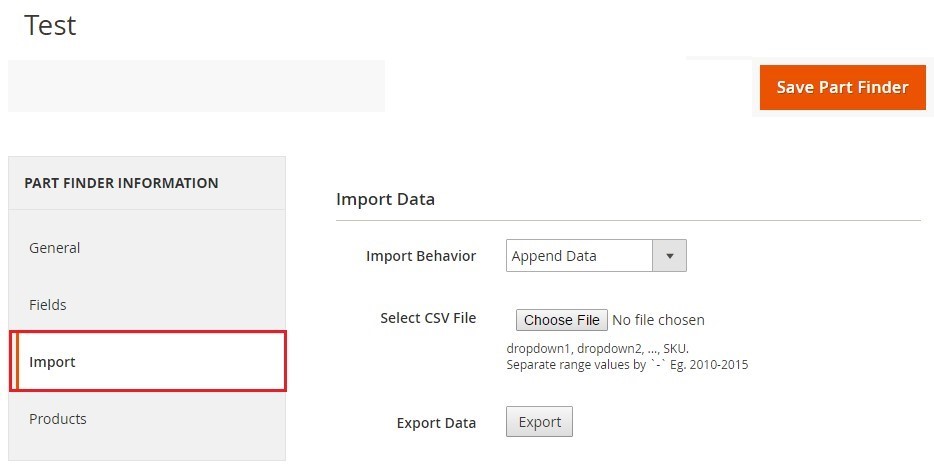
7. It consists of following fields.
- Import Behavior: To select options for appended data or deleted existing data.
- Select CSV File: to select the CSV file to apply to the extension.
- Export Data: To export data to the local system.
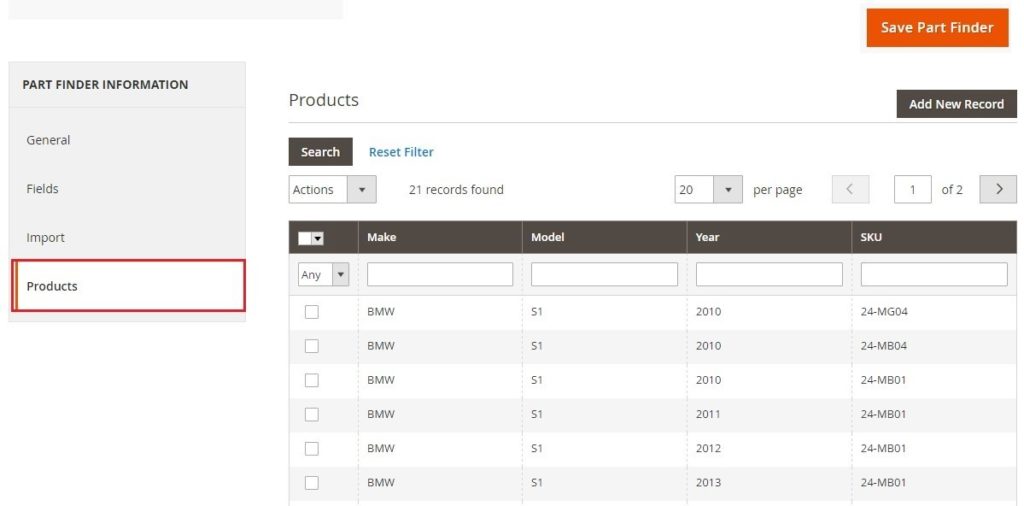
8. It provides an opportunity to check all product details with drop-down options and SKUs. Moreover, it provides an opportunity to add the missing product manually by clicking on ‘Add New Record’ button.
9. The ‘New Option Value’ dialog box will appear with various field pertaining to product attribute options and SKUs.
Steps to Activate Part Finder Module on the Category or Search Page of Magento Store
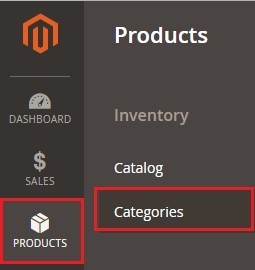
- The screenshot has taken by navigating to admin panel of the site to Products side menu where Categories section/button is located.
2. Now, click on the Categories button, the following screen will appear.
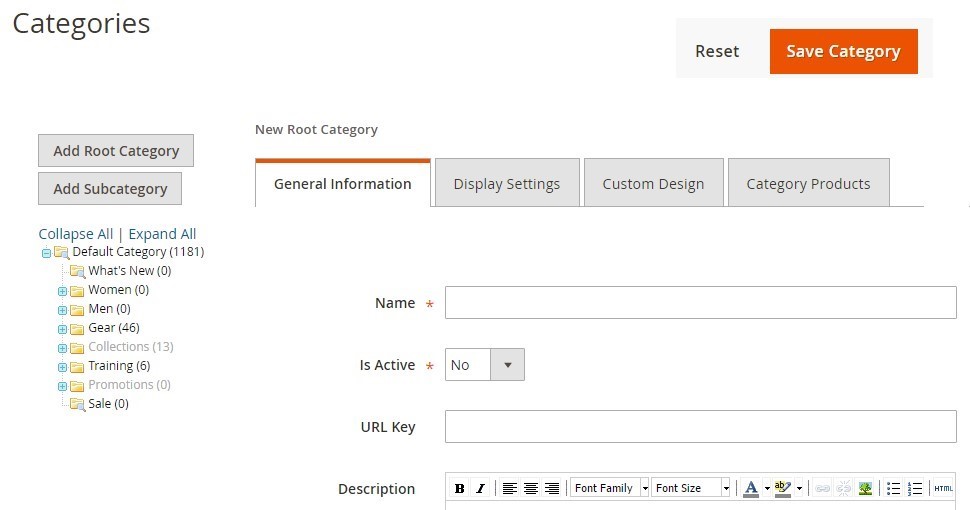
3. On the category page, Magento merchant needs to select the appropriate category from the sidebar navigation.
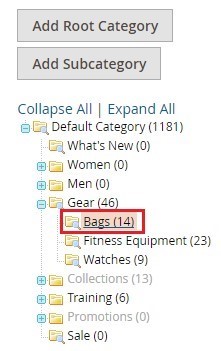
4. Suppose you have selected Gear as main directory and Bags as the sub-directory, you will find following dialog box.
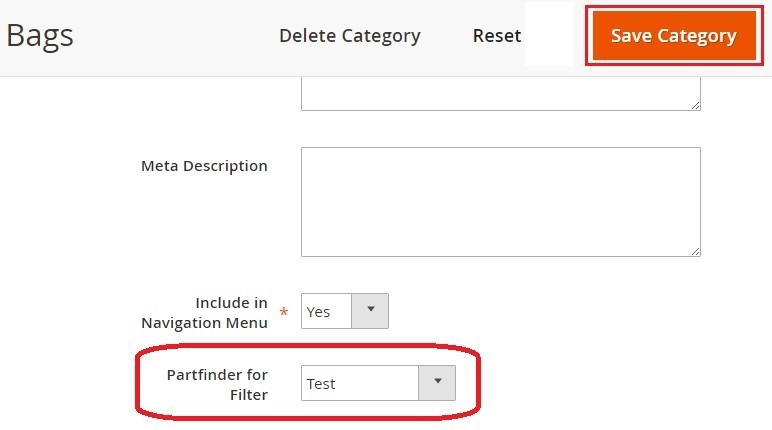
5. Now, you can select the part finder for filter and click on ‘Save Category’ button to save your option to display at front-end.
Steps to Display the Part Finder Module on the Front-end of Magento 2 Store
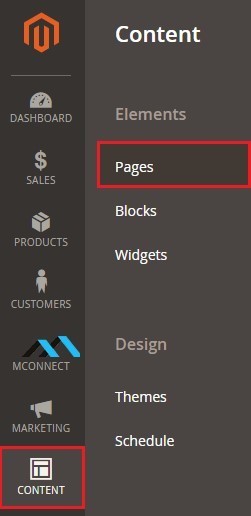
- Navigate to ‘Content’ side menu where ‘Pages’ section/button is located.
2. Now, click on the ‘Pages’ button, the following CMS screen will appear.

3. Now, select the ‘Edit’ option under the ‘Action’ menu for the page where you wish to display the Part Finder extension’s front-end module.
4. Now, suppose you select the About Us page to display part finder module, the edit screen for the About Us page will appear.

5. The next step is to select the Content Tab in the left sidebar. A CMS dialog box for content will appear where you need to add the following code to begin the display of Part Finder module on the About Us or any selected module.
{{block class=”Mconnect\Partfinder\Block\Partfinder” template=”Mconnect_Partfinder::cms_partfinder.phtml” pf_id=”1″}}
In the code, mention the id of the part finder against “pf_id”.
6. Finally, click on ‘Save Page’ button to apply the changes on the front-end of the Magento site. That’s all. You have done it.
Still have any doubt? We have shared video tutorial also for our customers learn from the visual presentation.
Any questions? Don’t hesitate to ask anything regarding this post or Product Part finder extension. Share your reviews regarding this blog post by posting comments below or contact us.


