Experts Need expert help? Don’t hesitate to talk.
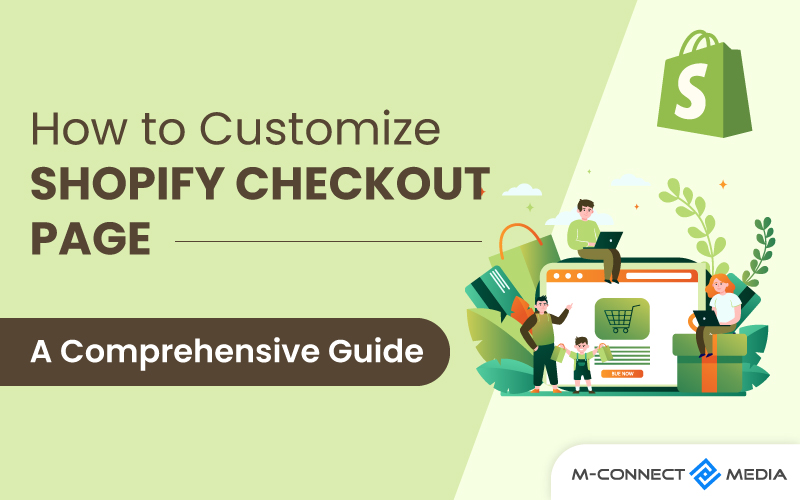
Are you looking to learn how to customize Shopify checkout page? You’re in the right place! We will guide you through a step-by-step process to upgrade and improve your Shopify store’s checkout page.
If you have a Shopify store, you know how important the checkout process is. In fact, some people say it’s the most important part of the customer’s experience.
If you’re not optimizing your store checkout page, you might be losing money. But don’t worry, we’re here to help.
In this article, we will teach you how to Customize your Shopify checkout page for better conversion rates! By following a few simple steps, you can improve the customer experience and make your Shopify cart page more efficient.
What is Shopify Checkout Page?
The Shopify Checkout Page is a special part of your online store where customers finish buying things. This is where customers give their shipping and payment information before completing their orders.
When you customize your Shopify Checkout Page, you can make it special and match your store’s style. You can change the colors, fonts, and how everything looks to make it more interesting for customers and show off your brand.
The Shopify Checkout Page is the last step when you buy something online. It’s where you give your address and payment details to finish your purchase. The checkout page is made to be easy to use and safe, so you can have a smooth and secure shopping experience.
Also Read: Key Roles & Responsibilities of a Shopify Developer: You Should Know Before Hiring
Why Learn How to Customize Shopify Checkout Page?
Learning how to customize the Shopify checkout page is unquestionably worth the time and effort required. Why? You’ll be able to observe a measurable return on investment.
If you’re unhappy with the appearance of your current checkout or want to add some new functionality to it, altering the checkout is a terrific method to accomplish so.
Checkout customization is an effective strategy to raise conversion rates and sales. When done correctly, customized checkouts may significantly increase your bottom line.
There are three reasons why you might want to customize the Shopify checkout page:
1. Provide On-Brand Experience Customers
One reason to consider customizing the Shopify checkout page is that it gives you more control over how your store looks. You can make sure that the checkout page matches the style of your store. This helps customers feel more trusting and confident in business.
But the main reason businesses invest in customizing the Shopify checkout page is because it can increase the conversion rate. This means more customers will complete purchases, which is important for the success of your business.
2. Increase Average Order Value
Customizing the Shopify checkout page can help you sell more and make more money. One way to do this is by showing special offers called “Order Bumps” during the checkout process.
These upsells and cross-sells can convince customers to buy more from your store, which means they spend more money and you earn more. By customizing your Shopify checkout page, you can create opportunities to increase the average value of each order, which is great for your business.
3. Enhance Conversion Rate
The customization of Shopify checkout page can help more people buy from your online store. It may sound amazing, but it’s true! Customizing the checkout page can bring even more benefits to your business.
When you provide useful information, like FAQs, on checkout page, you can answer any questions customers have before they decide to leave. This makes more likely to finish their purchase, which means you make more sales and earn money.
Also Read: 10 Best Shopify Development Trends To Consider in 2023
Types of Shopify Checkout Page Customizations
If you want to change the Shopify checkout page, You can consider following options:
Easier Shopify Visual Checkout Customizations
It’s a Shopify checkout customization option that you may find in your theme editor. In this situation, no additional tools are required, and this type of editing is available in all Shopify price levels except Shopify Plus.
To change the checkout template on your Shopify online store, click ‘Customize’ next to your current theme, then ‘Theme Settings’ and ‘Checkout’ on the left.
To alter customer login choices and necessary input fields, click the ‘Settings’ section in your Shopify admin and select ‘Checkout and accounts’.
Checkout Apps and Tools for Customization
There are many apps, tools, and special features in Shopify that can help you customize your checkout even more. Here are some cool things you can do:
- Show a message for free shipping
- Change how the progress bar looks
- Give a gift with a purchase
- Suggest other products to customers
- Add a timer to the checkout
- Display badges that make customers feel safe
- Show contact information
- Let customers share their feedback
- Make the checkout fit on just one page
Shopify Plus Customizations
If you have a Shopify Plus subscription, there’s an extra option for customizing your Shopify checkout page. With Shopify Plus, you can access the source code and make complete changes to the look and features of the checkout page. This means you have more control and can make it exactly how you want it.
Also Read: How You Can Boost Decision-making Power with Shopify Marketing Insights
How to Customize a Shopify Checkout Page
We have discussed Shopify checkout page customization possibilities. Let’s look at them more closely so you can make changes to your checkout. To customize your Shopify checkout page, you can follow these steps:
1. Add a Banner Background Image
To change the background of the banner on your Shopify checkout page, follow these steps:
- Open your Shopify Admin and go to “Online Store” section, then click on “Themes.”
- Look for the “Customize” button next to your current theme and click on it.
- In the theme editor, find the “Checkout” section and click on “Theme Settings.”
- Look for the “Banner” section and click on the “Select Image” button.
- Upload the image and click on save
By following these steps, you can choose a new image to use as the backdrop for the banner on checkout page. This allows you to customize the appearance of your online store and make it more aligned with your brand.
2. Add a Logo into the Shopify Checkout Page
To add your company logo to the Shopify checkout page, follow these steps:
- Open your Shopify Admin and go to the “Online Store” section, then click on “Themes.”
- Look for the “Customize” button next to current theme and click on it.
- In the theme editor, find the “Checkout” section and click on “Theme Settings.”
- Look for the “Logo” column and Select Image
- Choose the logo picture
- Adjust the position of the logo
- Set the size of the logo
- Click the “Save” button
By following these steps, you can add your company logo to the Shopify checkout page, which helps to make your online store more personalized and recognizable.
3. Fill the Main Content Area with a Background Image or Color
You can customize the color or background image of the main content section to match the style of your online business. This is where customers enter their shipping and payment information on the Shopify checkout page, so it’s important to choose a design that is easy to read. Here’s how you can make these changes:
- Open Shopify Admin and go to “Online Store,” then click on “Themes.”
- Look for the “Customize” button next to current theme and click on it.
- In the theme editor, find the “Checkout” section and click on “Theme Settings.”
- To add a background picture, click on the “Select picture” button in the “Main Content Area” section.
- If you prefer to change the background color, click on a box that says “Backdrop Color” and choose a color from the options.
- After all the changes you want, click on the “Save” button.
Also Read: 13 Best Shopify Marketing Strategies to Boost Sales Growth in 2023
4. Colorize the Form Fields
To make it easier for your customers to see and fill out the information on your order page, you may want to adjust the color of the form fields. Here’s how you can do it:
- Open Shopify Admin and go to “Online Store,” then “Themes.”
- Look for the “Customize” button next to current theme and click on it.
- In the theme editor, navigate to the “Checkout” section and select “Theme Settings.”
- In the “Main Content Area” section, find “Form Fields” option and click on the dropdown menu.
- You will have two options: make the form fields white or translucent. Choose the one you prefer.
- Once you have made your selection, click on the “Save” button.
5. Add background image or color to the Order Summary
When consumers move to the checkout, they will see a list of the things they intend to buy. In the following steps, you may add a background picture to the order summary or modify its color:
- Open your Shopify Admin and navigate to ‘Online Store,’ then ‘Themes.’
- Select a ‘Customize’ button next to current theme.
- In a theme editor, navigate to the ‘Checkout’ section and choose ‘Theme Settings’.
- To add a backdrop picture, select the ‘Select Image’ button in the ‘Order Summary’ section, or click a ‘backdrop Color’ box to open a color picker.
- Click on the “Save” button.
By adding a background image or changing the color of the order summary, you can make it visually appealing and enhance the overall checkout experience for your customers.
6. Replace or Remove Checkout Page Image
If you want to change or remove the image on your checkout page, you can follow these steps:
- Open your Shopify Admin and go to “Online Store,” then “Themes.”
- Look for the “Customize” button next to current theme and click on it.
- In the theme editor, navigate to the “Checkout” section and select “Theme Settings.”
- Scroll to the part of the checkout page where the image is located and click on the button.
- Click the “Update” button next to the image you want to change or remove.
- If you want to change the image, you can upload a new one.
- Click the “Save” button.
By following these steps, you can replace or remove the image on checkout page. This allows you to customize the page according to your preferences.
Also Read: Shopify Guide: How to Develop Product Development Strategy That Work
7. Change the colors of buttons and the accents
To change the colors of buttons and accents on the checkout screen, you can follow these steps:
- Open Shopify Admin and go to “Online Store,” then “Themes.”
- Look for the “Customize” button next to current theme and click on it.
- In the theme editor, navigate to the “Checkout” section and select “Theme Settings.”
- Under the “Colors” section, you will find options to change the colors of accents, buttons, and errors.
- Click on the options, such as “Accents,” “Buttons,” or “Errors,” to open a color picker.
- Use the color picker to choose the right colors for accents, buttons, and errors.
- Click the “Save” button
By following these steps, you can easily customize the colors of buttons and accents on the checkout screen. This allows you to create a visually appealing and cohesive checkout experience for your customers.
8. Enhance the Checkout Page with Post-Purchase Features
To make the checkout page even better, you can add post-purchase features that encourage customers to buy again. Follow these steps to do so:
- Go to the Shopify App Store and search for a post-purchase app that suits your needs.
- Choose the app and select “Add App.”
- Tap on “Install App” to install in Shopify store.
- Once the app is installed, go to the “Apps” section in Shopify Admin.
- Look for the post-purchase app you installed and select it.
- Configure the app according to your requirements.
By adding post-purchase features, you can encourage customers to make additional purchases and increase their satisfaction with your online store.
Finishing Up
That’s all you need to know about customizing the checkout page in Shopify. There are different ways to make your Shopify checkout page better. By using these techniques, you can increase the number of people who buy from your store and make more money.
If you customize your Shopify checkout page, you can have more customers and make more sales. It’s easy to make changes using the theme editor, apps, widgets, or Shopify Extensibility.
But if you need more help with your online store, you can hire professional Shopify theme and checkout developers. Mconnect Media has experts who can customize everything for you. If you want their help, you can contact us to get in touch with them today.
Also Read: A Comprehensive Guide: How to Launch Your Shopify Store
FAQs about the Shopify Checkout Page:
If you’re using Shopify, you may have some questions about the checkout page. Here are the answers to commonly asked questions:
1. What is the checkout in Shopify?
The checkout in Shopify is the final step when you sell things online. It’s where customers enter their payment and shipping information to complete their purchase.
2. Can you customize the Shopify checkout process?
Yes, you can completely customize the Shopify checkout process. You can change how it looks, add content, and even add a tracking pixel. If you want more details, you can visit the Shopify developer site.
3. How can I add a PayPal payment button to my Shopify checkout page?
To add a PayPal payment button to your Shopify checkout page, follow these steps:
- Open your Shopify Admin and go to Settings.
- Select the Payments option.
- Look for PayPal in the Supported Payment Methods section and click Activate.
4. Are these customization options available in Shopify Plus?
Yes, they are! In Shopify Plus, you have even more options for customizing your checkout page. You can modify the checkout page code to make it exactly how you want it.