Experts Need expert help? Don’t hesitate to talk.
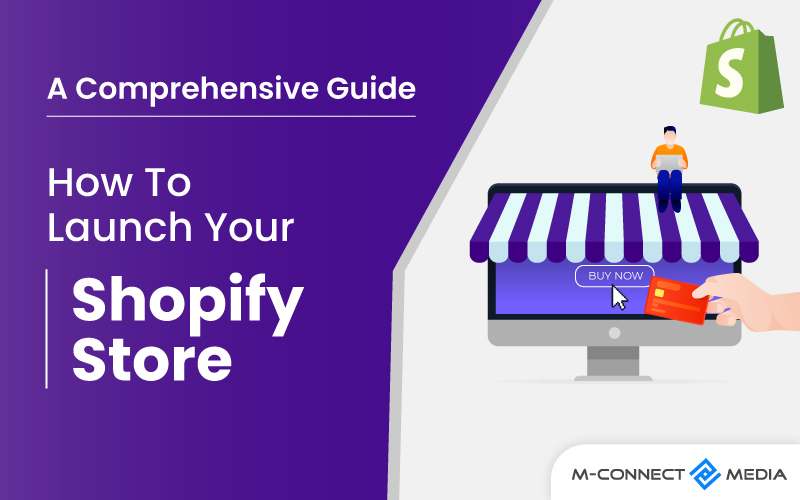
When it comes to launching a Shopify store, it’s important not to rush. How do I open my first Shopify store? Starting a fist online store is the first exciting step in your new business journey.
Shopify is a platform that lets you use their eCommerce services through a subscription. With Shopify, you can create an online store that has all the tools you need to sell, ship, and manage your products.
Building a new Shopify store takes time, but following a step-by-step process can make it easier and less stressful. Before launching your business, take a deep breath, assess the situation, and make sure everything is working properly.
If you’re here, it means you want to start your own business using Shopify. In this post, we’ll explore everything you need to know about launching a Shopify store and how to do it quickly. Let’s begin!
What is Shopify?
Shopify is a popular eCommerce platform that makes it easy to start an online business. Did you know that it actually began as a company selling snowboarding equipment on the Internet? They have processed over 1 billion orders, and the total money earned by merchants using Shopify is over $55 billion!
When you sign up for Shopify, you get a 14-day free trial to test out all its features. You can try designing your store, using different themes, managing your inventory, processing payments, and more.
How much does it cost to start a Shopify store? After the trial, you can choose from three different plans: $29, $79, or $299 per month, depending on what you need. If you’re just starting out, the $29 Basic Shopify plan is perfect for your online business.
And if you ever need help, don’t worry! You can reach their customer support team 24/7 through live chat, phone, or email. They’re always there to assist you if you have any questions or problems.
Also Read: How To Start Dropshipping Business in India Using Shopify and GlowRoad
How To Set Up a Shopify Store Before Launch
Is it easy to start Shopify? Setting up a Shopify store is easy and easier. You can do it in less than an hour, and that includes making sure everything is correct. You can get a 14-day free trial, so if you’re worried about making mistakes, don’t be! Take a deep breath and relax.
If you’re interested in using Shopify, go ahead and sign up. This will give you a chance to see what Shopify is all about. As a Shopify development company, we’re here to provide you with quick and simple tips for starting your Shopify store.
1. Create a Name for Store
Before creating your store, you need to have a unique name. If the name you choose is already taken, Shopify will ask you to pick a different one. But don’t worry, finding a unique name is not hard!
Shopify has a helpful tool called the Business Name Generator that can assist you. Just enter a word or term you want in your business name, and it will give you a list of 100 names that include that word.
Once you have chosen a name for your online business, it’s time to move on to the next step.
2. Account Sign Up
Now, go to Shopify and fill out the signup form to create your own account. You’ll need to provide some information, such as the name of your shop, your email address, and a password. They will also ask for your name, nationality, address, and phone number.
Another question you’ll need to answer is whether you have products to sell and what you want to offer. If you’re trying out Shopify to see if you like it, choose “I’m just playing around” from the “Do you have products?” options.
Also Read: 5 Best Shopify Wholesale Apps to Consider for Your Business in 2023
3. Choose Stores’ Theme
You will be transported directly to shop admin interface after signing up. You are now ready to begin customizing your store, accepting payments, uploading items, and sending orders to consumers.
But don’t forget that you’ll need a front-end where visitors may interact and explore product list. You may accomplish by selecting a theme from Shopify theme shop.
You may also access the HTML and CSS files if you want to make more detailed modifications. However, because the theme is already modifiable without code, there are few constraints to what may be accomplished.
If you require expert assistance. Shopify provides an international network of design companies on Shopify Experts. You may hire someone to build Shopify store.
Complete the following steps to choose the perfect theme for your store needs:
- Browse Shopify Theme Store
After logging into Shopify, you can visit the Shopify Theme Store. There are more than 70 themes to choose from, and most of them are free. You can use filters to help you find the perfect theme.
You can select the category and features you want in a theme. You can also choose between premium and free themes, and even filter industry and theme style.
- Check Theme Reviews and Functionality
When you find a theme you like, you can click on the example image to learn more about it. It’s important to check if the theme is responsive or mobile-friendly before buying it.
If the theme comes in different styles, you can also see additional demo versions of the site by choosing different colors. You can read reviews from other people who have used the theme.
- Obtain Best Theme
When you’ve discovered something you like, click the Add theme button. If you actually want to install the theme, Shopify will ask you to confirm. You may then select Publish as my Shop’s Theme.
And don’t worry if you’re not sure if this theme is perfect for you; you can always alter your mind later. After the theme installed, Shopify will notify you and you can access Theme Manager.
4. Setting Up Your Store
You won’t wind up with a website that appears like a clone of any other business. Shopify themes allow you to make easy tweaks that may alter the design of your store.
You will see the admin panel of store after shopify login in. It is time to begin customizing your store, uploading products, and configuring payment systems and delivery choices.
When you click on it, you’ll be transported to a page where you may manage every essential feature of your store’s theme. The theme settings section also has some unique features.
Having used dashboard personally, It is quite simple to use and can be learned along the way without any prior training. With a single click, you can check how your site looks on a mobile device.
5. Add Your Products
Before you go live, you must add some things to your store. Select Products from your store’s dashboard. There is an Add product button in the middle of the page, or in the upper right corner if you have already submitted some items.
Product images are vital in driving sales, so make sure you show off your products in the best possible light and highlight any unique characteristics in close-up shots.
Once you’ve filled in all of the information, remember to hit the Save product button or you’ll have to start over. You can also establish collections of products that share one or more traits and looked for customers when they visit your store.
With all of the relevant information in hand, we will begin the process of making your online store “live.”
Also Read: Video Marketing: Build Successful Video Strategy for Shopify Store in 2023
What Do a Shopify Developer Do?
A Shopify developer is like a special kind of software engineer who knows how to work with the Shopify platform. They use their skills to create online stores for selling things.
They also add extra features to the website, like special tools or ways to pay for things. They can even connect the website to other important systems, like payment gateways or shipping services.
In short, a Shopify developer is a person who knows a lot about making online stores work smoothly and look great at the same time.
Stepwise Guide to launch your Shopify store
You’ve worked hard to create a Shopify site that you’re proud of. You’ve imported all your products and written all the necessary legal documents. Now it’s time to complete the final steps and launch your Shopify store. How do I publish my Shopify store?
The following are the steps you need to do to launch or publish your online Shopify store:
1. Create and Add A Domain Name
To make your website live and easily accessible to customers, you need to choose a domain name. A domain name is like address of online store that people can type in to find your business.
Shopify can help you get a domain name quickly and easily. They will add the domain name to your store. The cost of a domain name is usually around $9 to $14 per year.
Alternatively, you can buy a domain name from another company like GoDaddy or Bluehost. These domain names usually start at around $11 per year.
If you’re not familiar with website hosting and want to save time, purchasing a domain name from Shopify is a good option.
To add a new domain, go to the “Online Store” section in the left menu of your Shopify dashboard. Then, under “Domains,” use the “Add an existing domain” feature to add your domain name.
Also Read: Shopify Guide: How to Develop Product Development Strategy That Work
2. Update the DNS records
If you bought your domain from a different company, like GoDaddy, you’ll need to change the DNS records. Domain Name System is a system that connects a domain name to its specific location on the internet.
For example, if you registered domain with GoDaddy, they will have a generic name server like NS1.godaddy.com to manage DNS records.
By updating DNS records, you can direct domain name to the correct IP address, like storename.shopify.com. This ensures that when people type in your domain name, they will be taken to your Shopify store.
3. Storefront Password Remove
Before you start, ensure to deactivate the password if Shopify has protected your shop theme. It may sound funny, but many people forget to do this.
Sometimes, as the shop admin, you can easily forget because you can access Shopify store while signed in. Even if you don’t remember enabling this feature, it’s good to spend a few minutes checking to be sure.
To find this option, go to the Online Store page and click on Preferences. Then, in the Password protection section, uncheck the Enable password box.
4. Set the Primary Domain
When you first set up your store, you get a default subdomain under the myshopify.com domain name. While you can still access your site with this address, it looks more professional to have your own domain name.
In Shopify’s control panel, you can register a domain for a reasonable fee. You can find these options in the Domains section of the Store menu. If you have more than two domains, you can choose one as the primary.
The most important part of this step is making sure the “Redirect all traffic to the primary domain” option is turned on. This tells search engines the exact web address where Shopify store is located avoiding any confusion.
5. Adding More Domains If Needed
Steps 1 and 2 can be repeated for as many domains as you want. All domain names will be redirected to the principal domain.
You may modify this setting at any time by clicking the Set as primary button next to each domain name.
Please keep in mind that the domain names you add to store has no impact on the SEO of your site.
Also Read: 13 Best Shopify Marketing Strategies to Boost Sales Growth in 2023
6. Your Shop is Now Live
Congratulations on completing all the previous tasks! You now have a fully functional and working Shopify web store. Remember, you can still make changes to any aspect of business using the admin backend dashboard.
So, if there’s anything you’re not happy with, don’t worry! You have the power to customize and improve store as you please.
Starting a Shopify online business but not sure if you’re ready for the big reveal? The Shopify launch checklist may be of use to you!
Conclusion
That’s all; now click the publish button to open your Shopify store, and it’s ready to go live and connect with the rest of the world. But this is only the beginning; you have a long way to go before you can generate sales or take care of clients.
The process of setting up a Shopify store appears complex at first, but if you have enough time and knowledge, you will succeed. In any case, we welcome your feedback at any stage of the process.
Mconnect Media is a top certified Shopify developer team, and we are only a click away from assisting you; simply contact us and share your pain with us. We are always delighted to hear from you.
Is there anything more you’d want to say? Then please share your thoughts in the comment area below; I’m always happy to respond. And, as usual, best wishes with your eCommerce venture!
Also Read: How to Build Branded Merchandise That Your Shopify Customers Will Love
Shopify FAQs:
- Is Shopify available in India?
There are over 30,000 Shopify stores in India and over 30 million Shopify stores worldwide. There are also several Shopify applications available to improve the functionality of eCommerce shops and help online stores flourish.
- Is Shopify better than Amazon?
Shopify gives you more choices for making online stores than Amazon. It’s great for businesses that want to save money on storage because it has dropshipping connections. Amazon also has good tools for selling, but Shopify’s tools are even better and more powerful.
- When was Shopify launched in India?
Shopify has been working in India for ten years. We started doing a lot of work in India between 2010 and 2012, but for the first five years, our main focus was helping merchants get their businesses online through a network of partners.